
QuantumBNG Baremetal Quick Start
Audience: the operator installing QuantumBNG for the first time.
Time budget: ~30 minutes from a fresh Ubuntu 24.04 box to a working BNG serving DHCP leases.
Assumes: shell access to the box (SSH or console), root/sudo, a working management NIC on the LAN.
If you want the full manual instead — every panel, every setting, every operator task — see user-guide.md. This document is the "get it running" script; that one is the reference.
1. Prerequisites
| Item | Minimum | Recommended |
|---|---|---|
| OS | Ubuntu 24.04 LTS | Ubuntu 24.04 LTS |
| CPU | 4 cores | 10+ cores (1 for main, 6 for VPP workers, 3 for OS/services) |
| RAM | 8 GB | 16 GB |
| Disk | 20 GB free | 40 GB free |
| NIC (management) | 1× 1 Gbps, kernel driver | same |
| NIC (subscriber-facing) | 1× DPDK-supported (Intel E810/E830, XL710) | same |
| Network | LAN access to the customer subnet + upstream router | same |
CPU pinning matters. If the box has isolated cores for VPP (isolcpus=1-6 in /proc/cmdline — the recommended setup), the installer preserves whatever corelist-workers line matches those cores. If the box has no isolcpus, the installer falls back to a single-worker boot-safe config.
Don't run this on a shared / production box. The installer edits /etc/vpp/startup.conf, opens ports 8443/3000, installs docker.io if missing, and adds systemd units. Fine for a dedicated appliance; disruptive on a general-purpose server.
If you're evaluating in VirtualBox, three constraints:
- Use ≤ 2 vCPUs on the guest. Ubuntu HWE kernel 7.0.0 has an SMP mount-path deadlock (
sd-mkdcredsmutex race) that reliably wedges the post-install reboot at ≥ 6 vCPUs. 1–2 vCPUs boot cleanly. - docker-ce in the host image will block install — the controller
.debdepends ondocker.ioand the two conflict. Either use a base image without Docker preinstalled orapt-get remove docker-ce docker-ce-cli containerd.iofirst (preflight will detect this and abort with an actionable message). - VirtualBox guests don't expose
pdpe1gb— the installer detects that and falls back to 2 MiB × 4096 hugepages (same 8 GiB total). No action needed from you.
2. Download the installer
Grab the latest bundle from the release page:
VERSION=1.2.0-62
curl -LO https://github.com/Bluedot-Insight/quantumipoebng/releases/download/v${VERSION}/quantumipoebng_v${VERSION}.tar.gz
tar xzf quantumipoebng_v${VERSION}.tar.gz
cd quantumtouch-installer-${VERSION}
Optional — integrity check. Every release ships a .sha256 sidecar. HTTPS already covers transit integrity, so this only guards against on-disk corruption after the download completes (rare):
curl -LO https://github.com/Bluedot-Insight/quantumipoebng/releases/download/v${VERSION}/quantumipoebng_v${VERSION}.tar.gz.sha256
sha256sum -c quantumipoebng_v${VERSION}.tar.gz.sha256   # prints OK
3. Run the installer
sudo ./install.shRoughly what happens in the ~3 minutes it runs:
| Step | What it's doing |
|---|---|
| Preflight | Sanity-checks OS / kernel / CPU / mem / disk / docker / systemd / network. Refuses to proceed if something's wrong; add QT_SKIP_PREFLIGHT=1 to force. |
| Upstream controller | Installs the pinned controller drop (VPP, controller, vpp-bridge). |
| VPP CPU config | Patches /etc/vpp/startup.conf — preserves your corelist-workers if the cores exist; otherwise stamps a single-worker boot-safe minimum. |
| bng-deploy shim | Installs the Flask webui + gunicorn on port 8443. Drops in a systemd override that raises gunicorn --timeout to 180s so long-running API calls (subscriber onboards, snapshot restores) don't get killed at gunicorn's 30s default. |
| Bootstrap admin key + first-run token | Mints a one-time admin API key + first-run setup wizard token. |
| Healthcheck | Confirms the controller reports status=ok with vpp.connected=true. |
| Banner | Prints the admin key + the first-run URL. |
At the end you'll see something like:
================================================================
  QuantumTouch BNG installed (quantumtouch-installer 1.2.0-62)
================================================================

  Web UI:            https://192.168.86.33:8443/
  Controller API:    https://localhost:3000/v1/bng/health
  API reference:     https://localhost:3000/redoc.html

  ------------------------------------------------------------
   BOOTSTRAP ADMIN KEY (shown ONCE — copy this now):

       quantum_8f232944a8cd2317f9cf270b5b857886

   Use for API calls until you mint a per-operator key:
     curl -H 'Authorization: Bearer quantum_...'
          https://localhost:3000/v1/bng/health
  ------------------------------------------------------------

  ------------------------------------------------------------
   FIRST-RUN SETUP — open in a browser now:

       https://192.168.86.33:8443/bng/setup-wizard?token=bs_...
  ------------------------------------------------------------
Copy the admin key and the setup URL now. The admin key is shown once and never printed again — losing it means recovering via sudo /opt/bng-deploy/bin/reset-admin.sh. The setup token can be recovered via sudo /opt/bng-deploy/bin/show-bootstrap-token.sh while no admin exists.
4. Before you begin — information to gather
The setup wizard is 11 steps and it goes fastest when you have every answer ready before you start. Copy or print this checklist; each row is one wizard field:
| Info | Example | Where you find it |
|---|---|---|
| Hostname | qtbng-1 |
Your naming scheme |
| Timezone | America/New_York |
timedatectl list-timezones |
| NTP server | pool.ntp.org or your corporate NTP |
Ops team |
| Admin email | netops@example.com |
Ops team |
| Which NICs are for subscribers / uplink / management | 0000:47:00.0 = access, 0000:47:00.1 = uplink |
lspci -d 8086: on the box + your cable map |
| Number of VPP worker cores | 6 (recommended for a 10-core box) |
Your isolcpus= kernel arg, or accept the wizard's default |
| Rate plan | Name Bronze, down 20/25 Mbps CIR/PIR, up 10/12 Mbps CIR/PIR |
Product policy |
| DHCP pool CIDR + gateway | 100.64.0.0/24 gateway 100.64.0.1 |
Network design |
| DNS servers to hand out | 8.8.8.8, 1.1.1.1 (or your resolvers) |
Network design |
| Auth mode | local (single admin, all subs admitted), radius (external AAA), or hybrid |
Deployment plan |
RADIUS server + shared secret (if radius / hybrid) |
radius.corp:1812 + secret |
AAA team |
| Captive portal URL (optional) | http://192.168.86.33:8088/ |
Skip unless you're running gated admission |
| TLS cert (optional) | .pem + .key file paths |
Skip to use the auto-generated self-signed cert |
Physical prep:
- Both NICs cabled (management for the webui, subscriber-facing for actual traffic).
- SSH access from your workstation to the box.
- The bootstrap admin key and first-run URL from the install banner (Section 3) — the key is shown once.
5. First-run setup wizard
Open the setup URL from the install banner. You'll hit a self-signed cert warning — accept it (see trust-the-cert.md if you want a real cert).
You'll land on the login page:
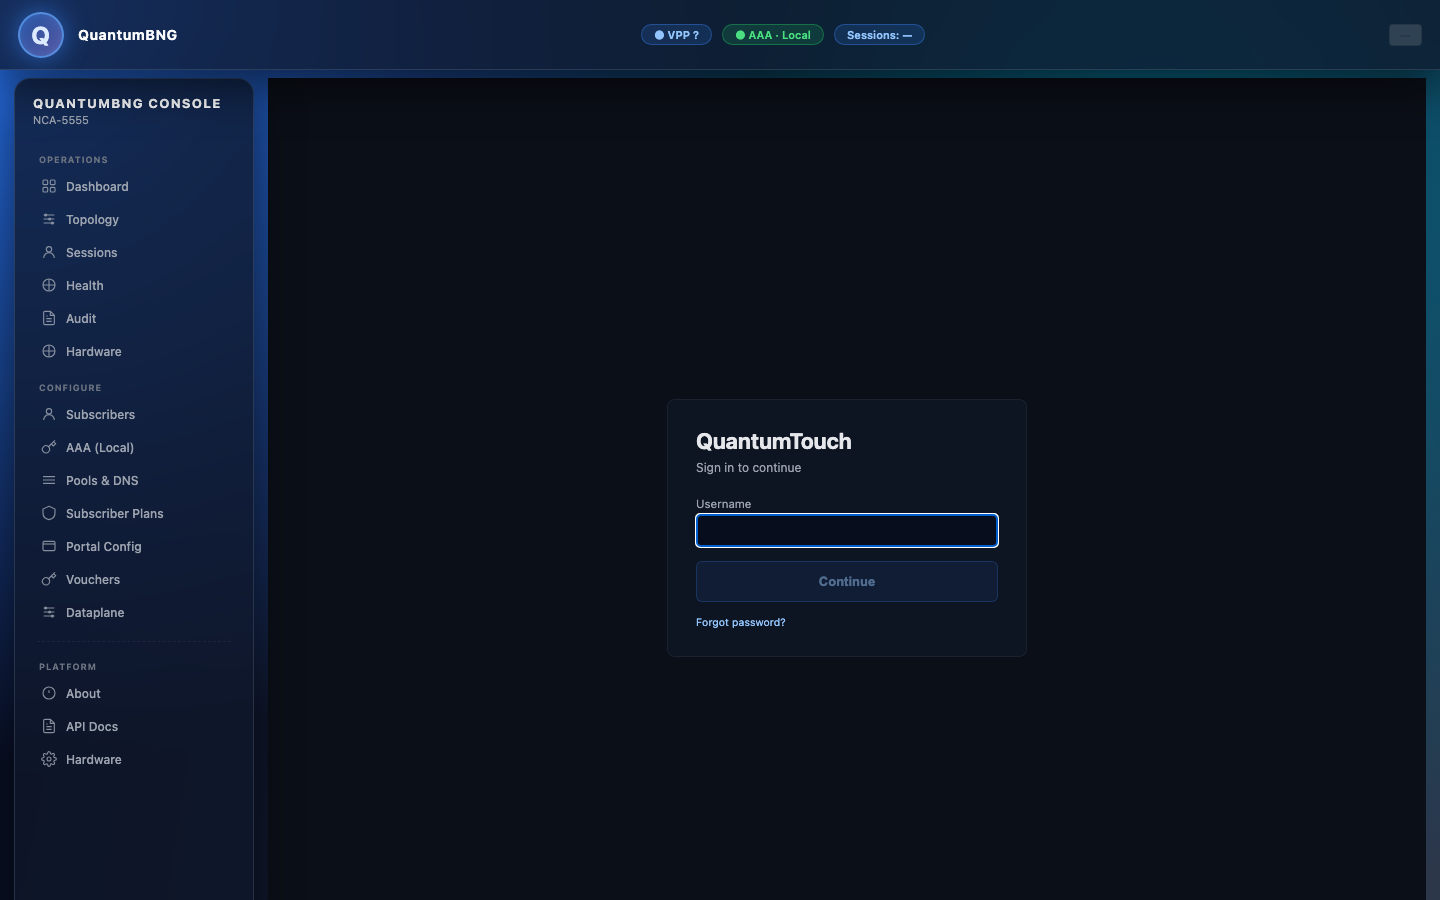
Log in as the bootstrap admin. The wizard's left rail shows all 11 steps; the progress bar at the bottom shows how much is left. The Next button is disabled until the current step's required fields are valid. You can close the tab mid-way and pick up where you left off — the wizard saves a draft locally.
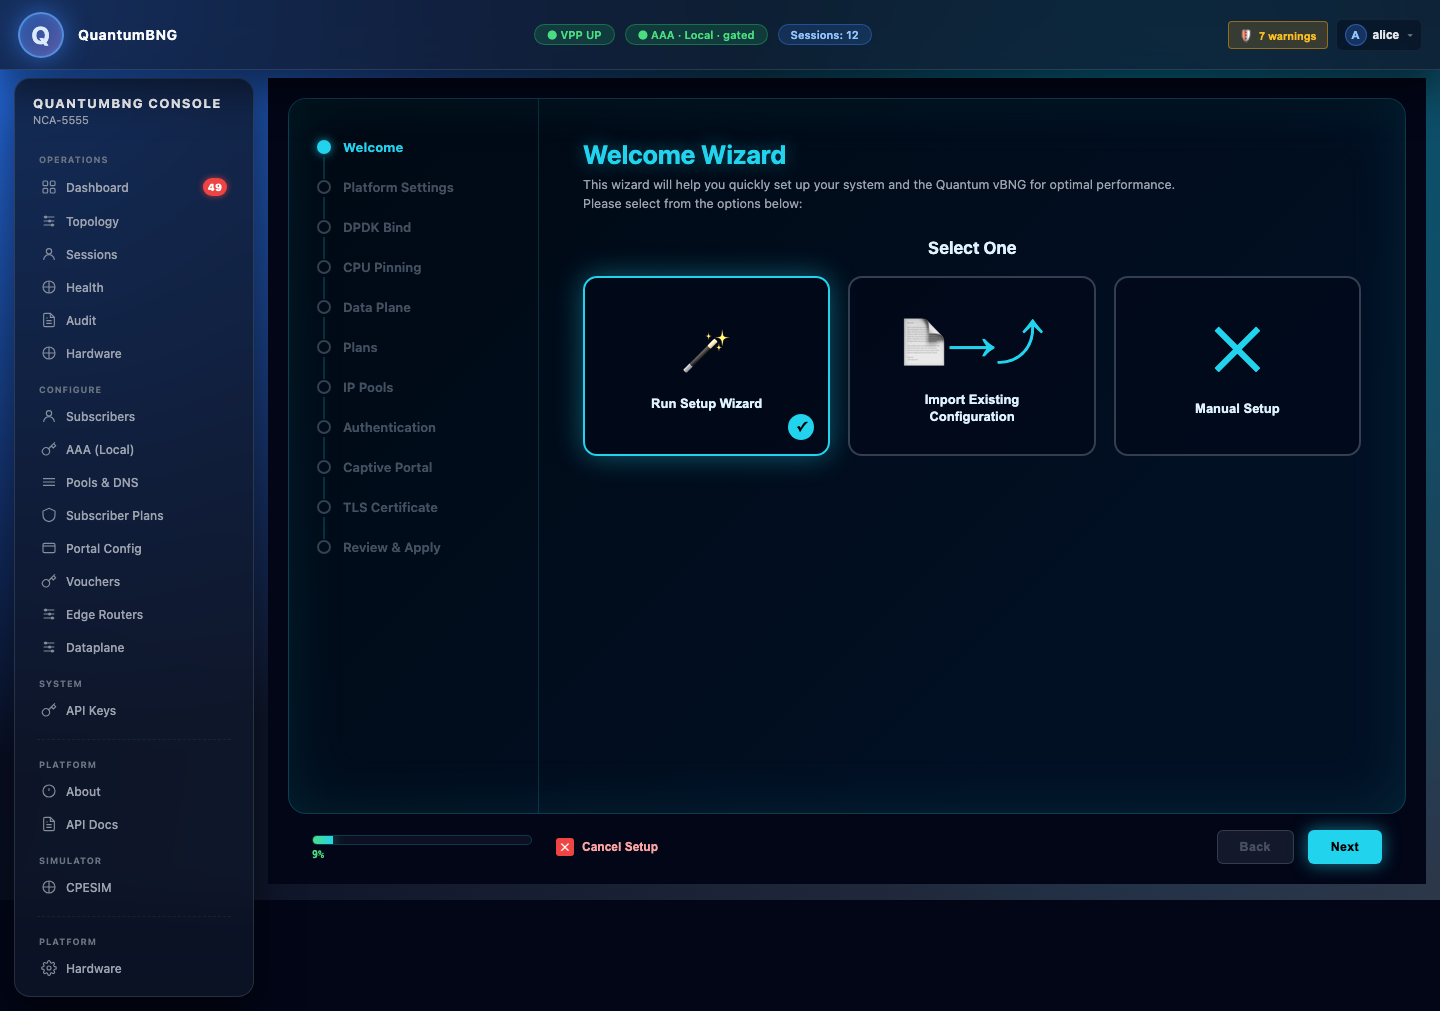
Step 1 — Welcome
Pick which mode to run: Run Setup Wizard (guided, recommended for first install), Import Existing Configuration (restore a previously-saved wizard JSON), or Manual Setup (skip the wizard and configure from the individual pages).
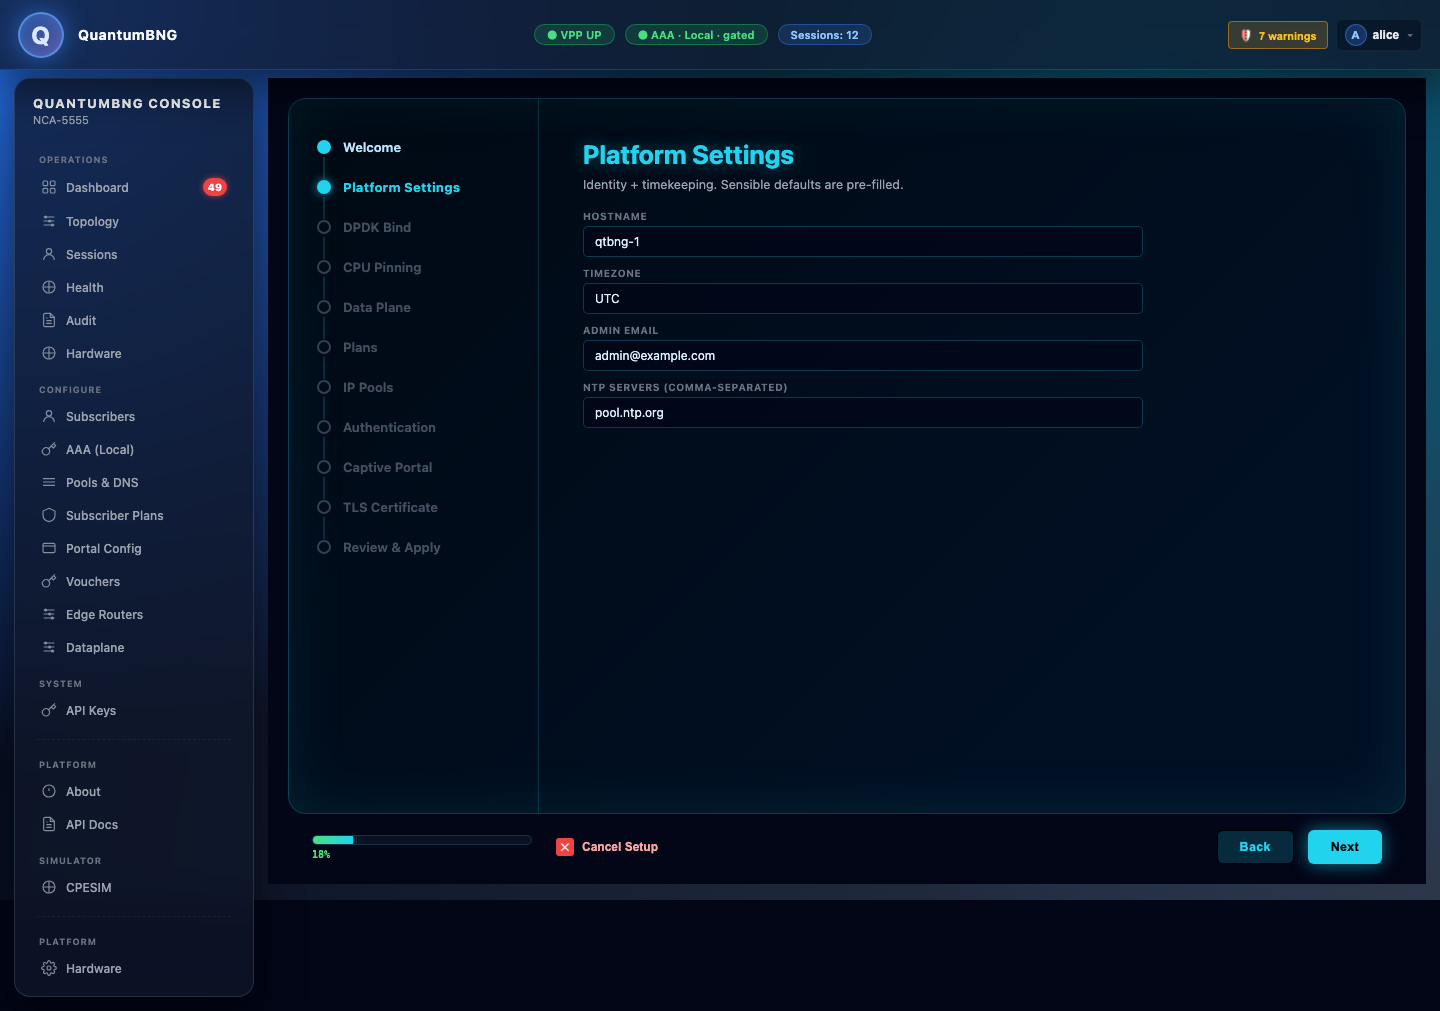
Step 2 — Platform Settings
Hostname, timezone, NTP server, admin email. This is what the box will identify itself as in reports, log lines, and outgoing NTP client requests.
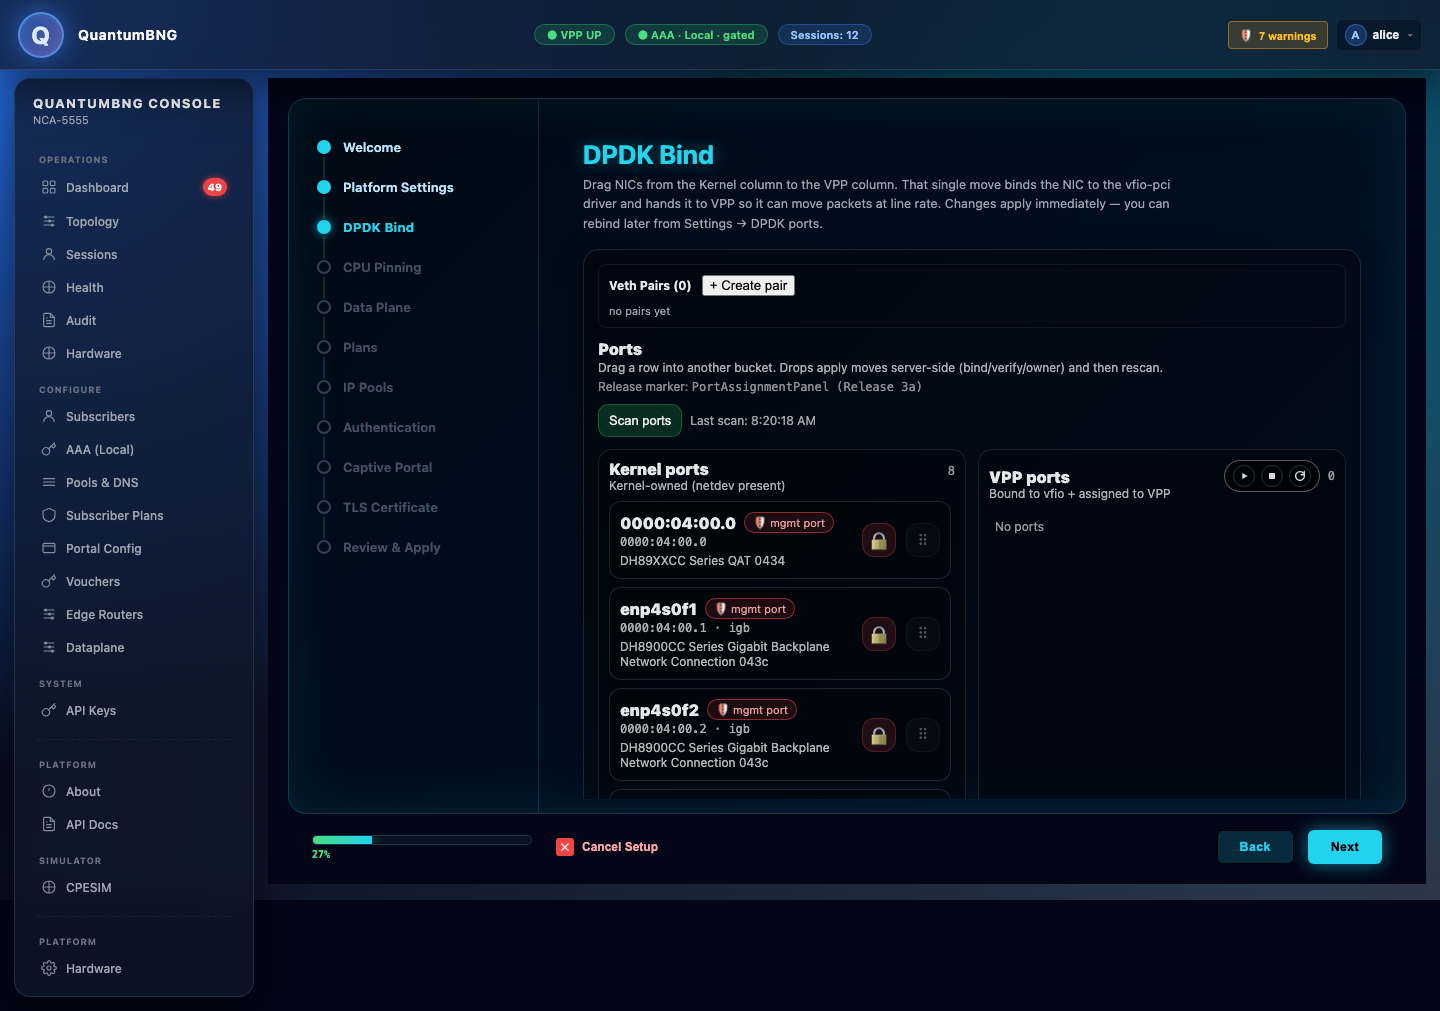
Step 3 — DPDK Bind
Drag NICs from the Kernel ports column to the VPP ports column. That single move binds the NIC to the vfio-pci driver and hands it to VPP so it can move packets at line rate. Keep your management NIC on the kernel side (it stays reachable). Only NICs on the VPP side become selectable in step 5.
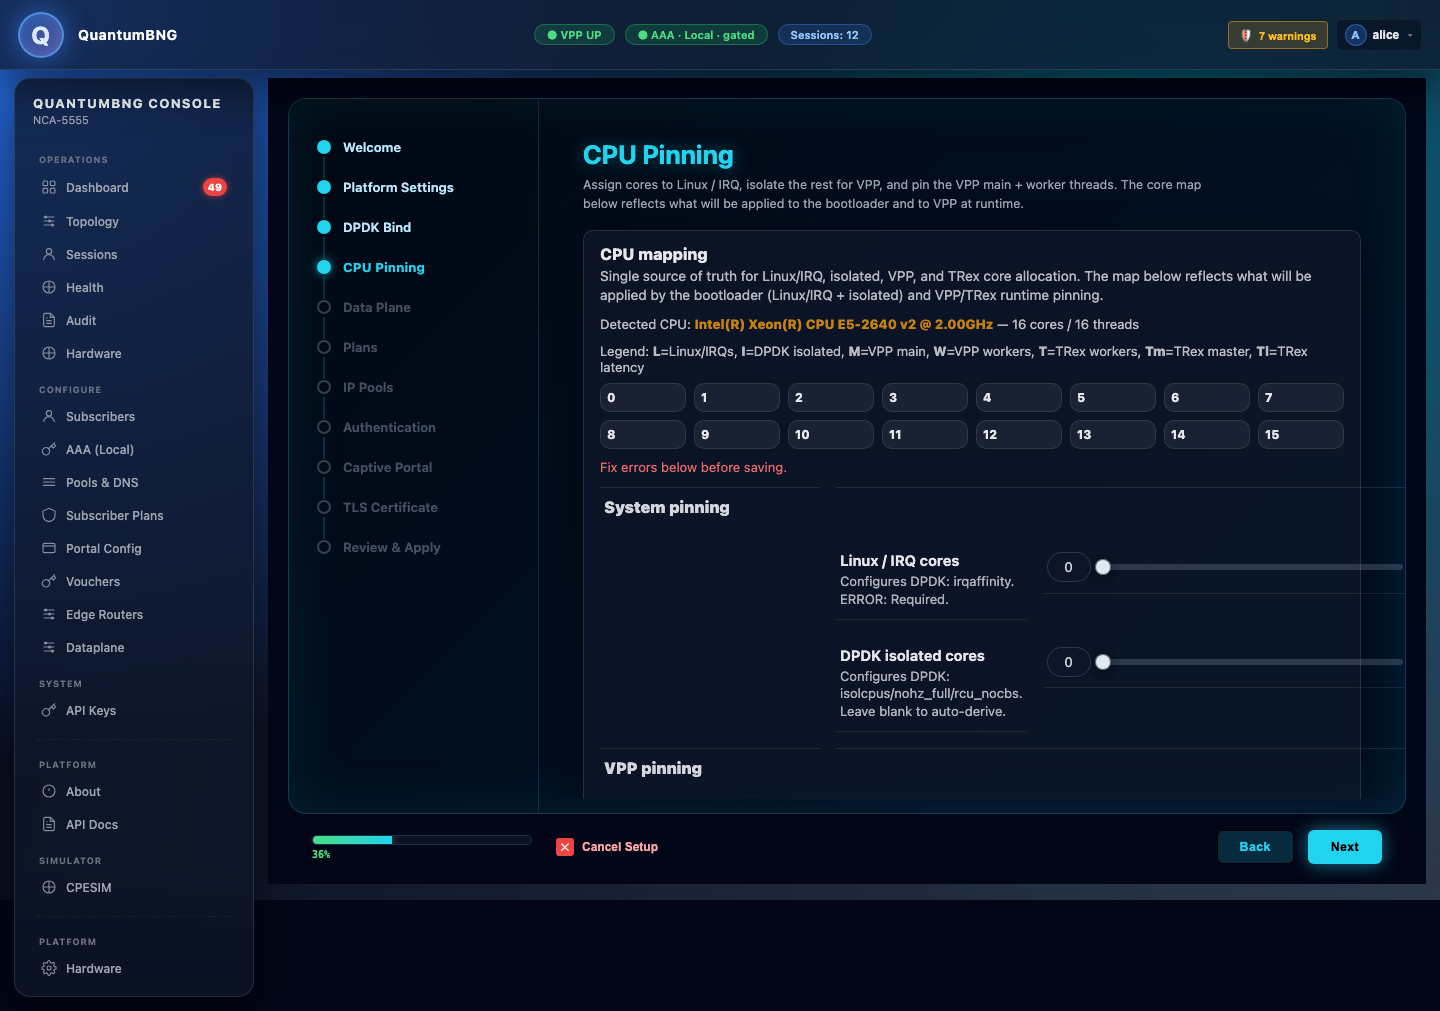
Step 4 — CPU Pinning
Choose how many cores are VPP workers and which physical CPUs they pin to. If you booted the kernel with isolcpus=, the wizard suggests those cores. Recommended: accept the default unless you know you want something different.
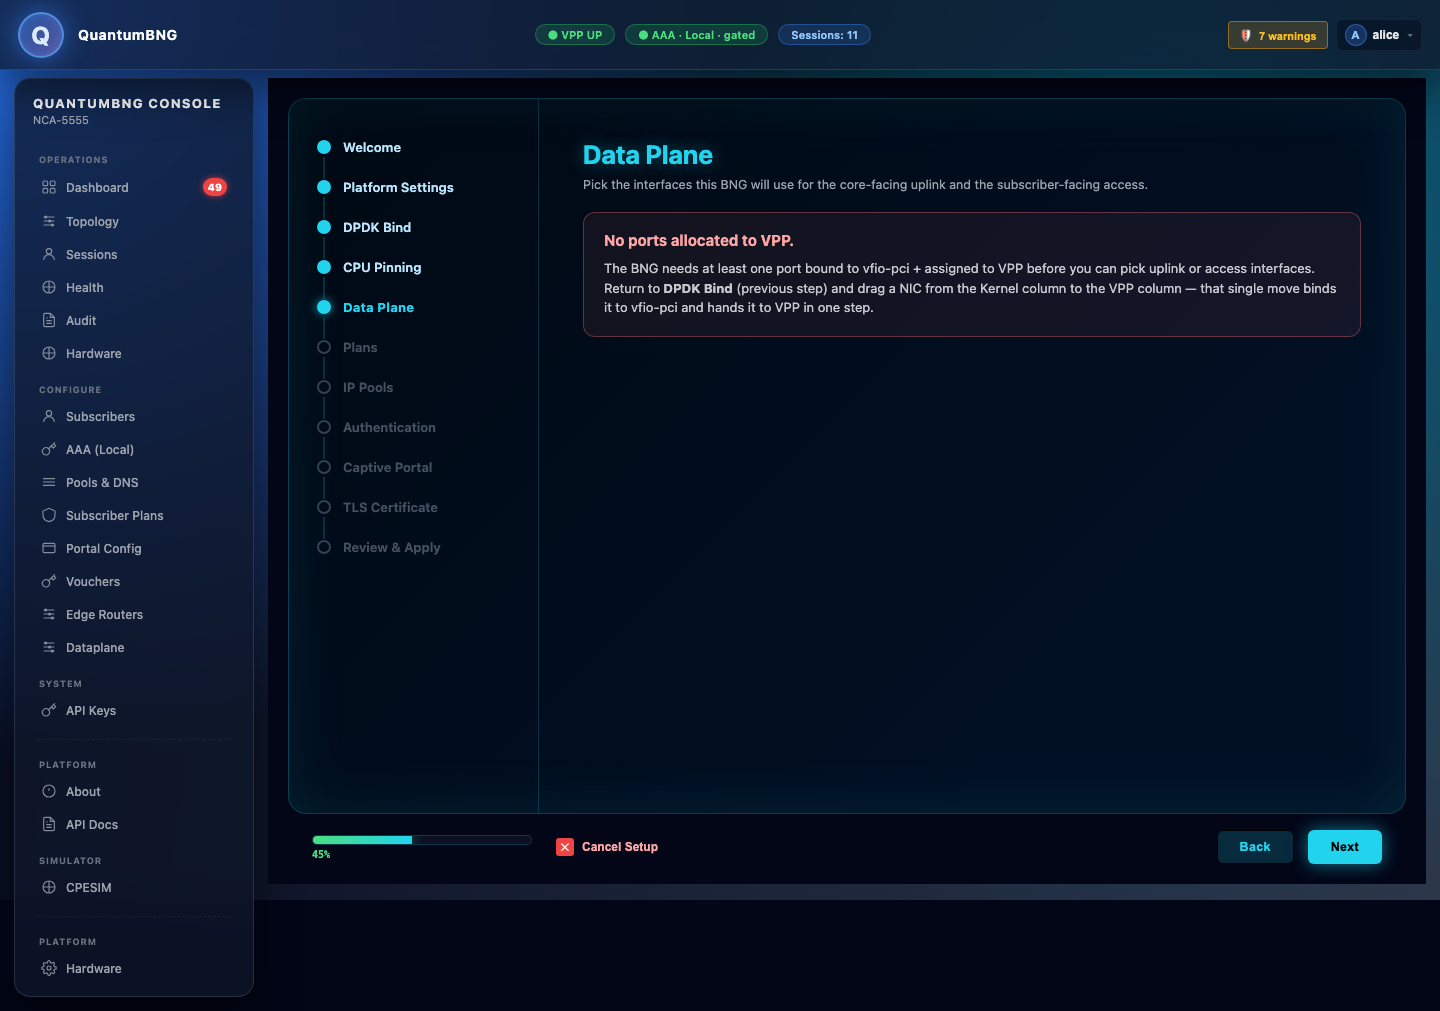
Step 5 — Data Plane
Pick one VPP interface as Uplink (WAN, toward your edge router) and one as Access (subscriber, toward the CPEs). The dropdowns only list interfaces you bound to DPDK in step 3.
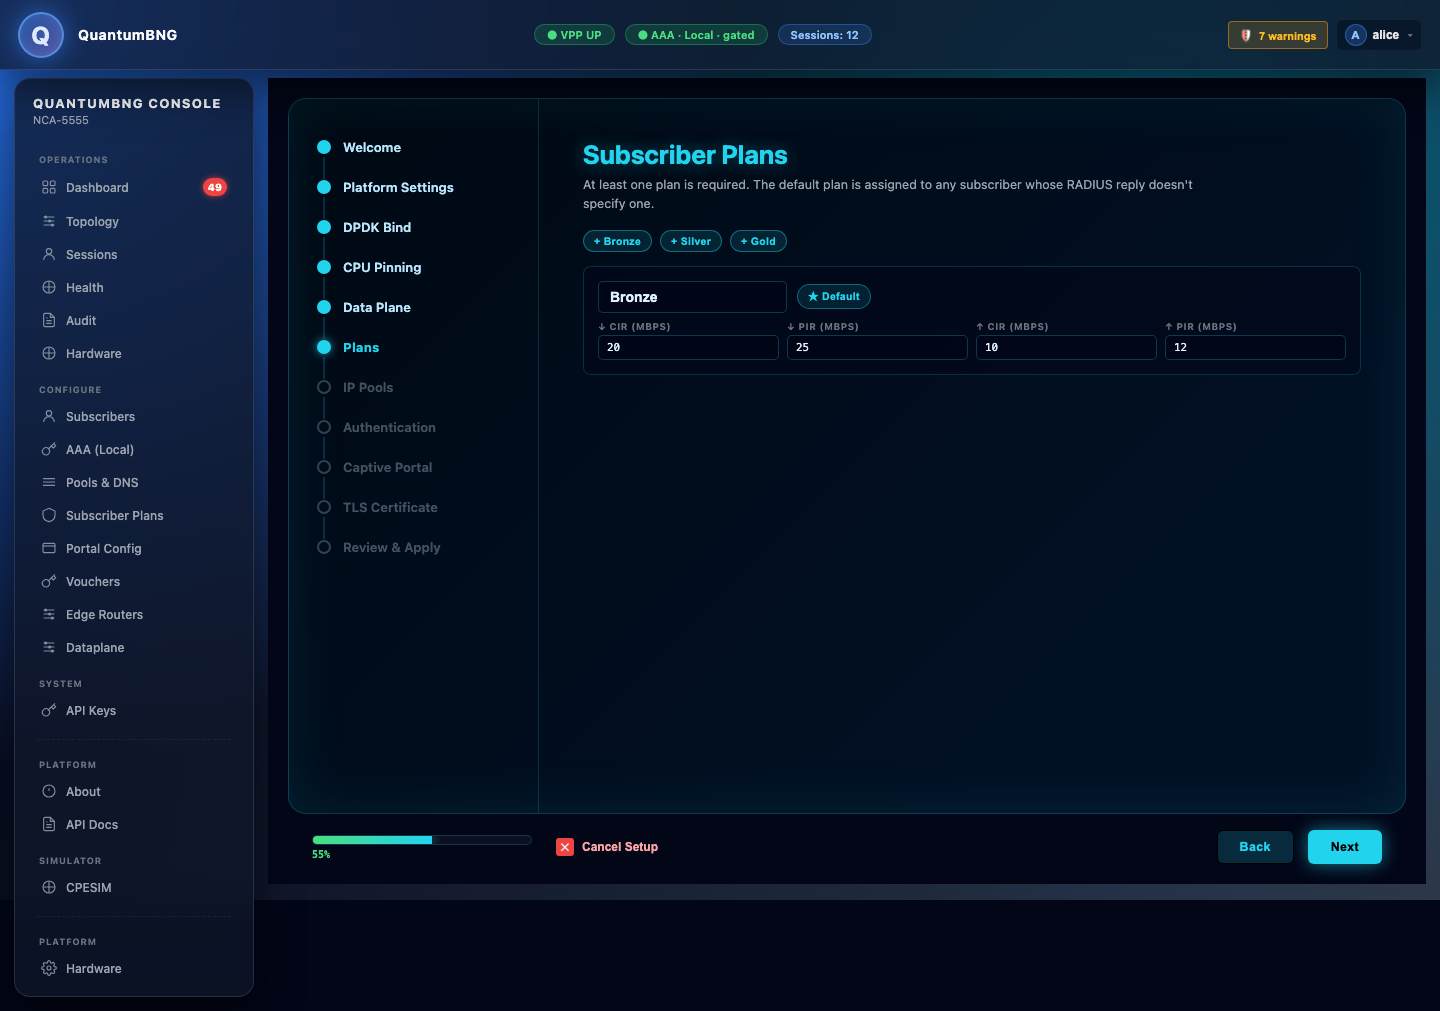
Step 6 — Plans
Define at least one rate plan. Each plan has committed (CIR) and peak (PIR) rates in both directions, all in kbps. Mark one plan as default — that's what a subscriber gets if AAA doesn't hand back an explicit plan name.
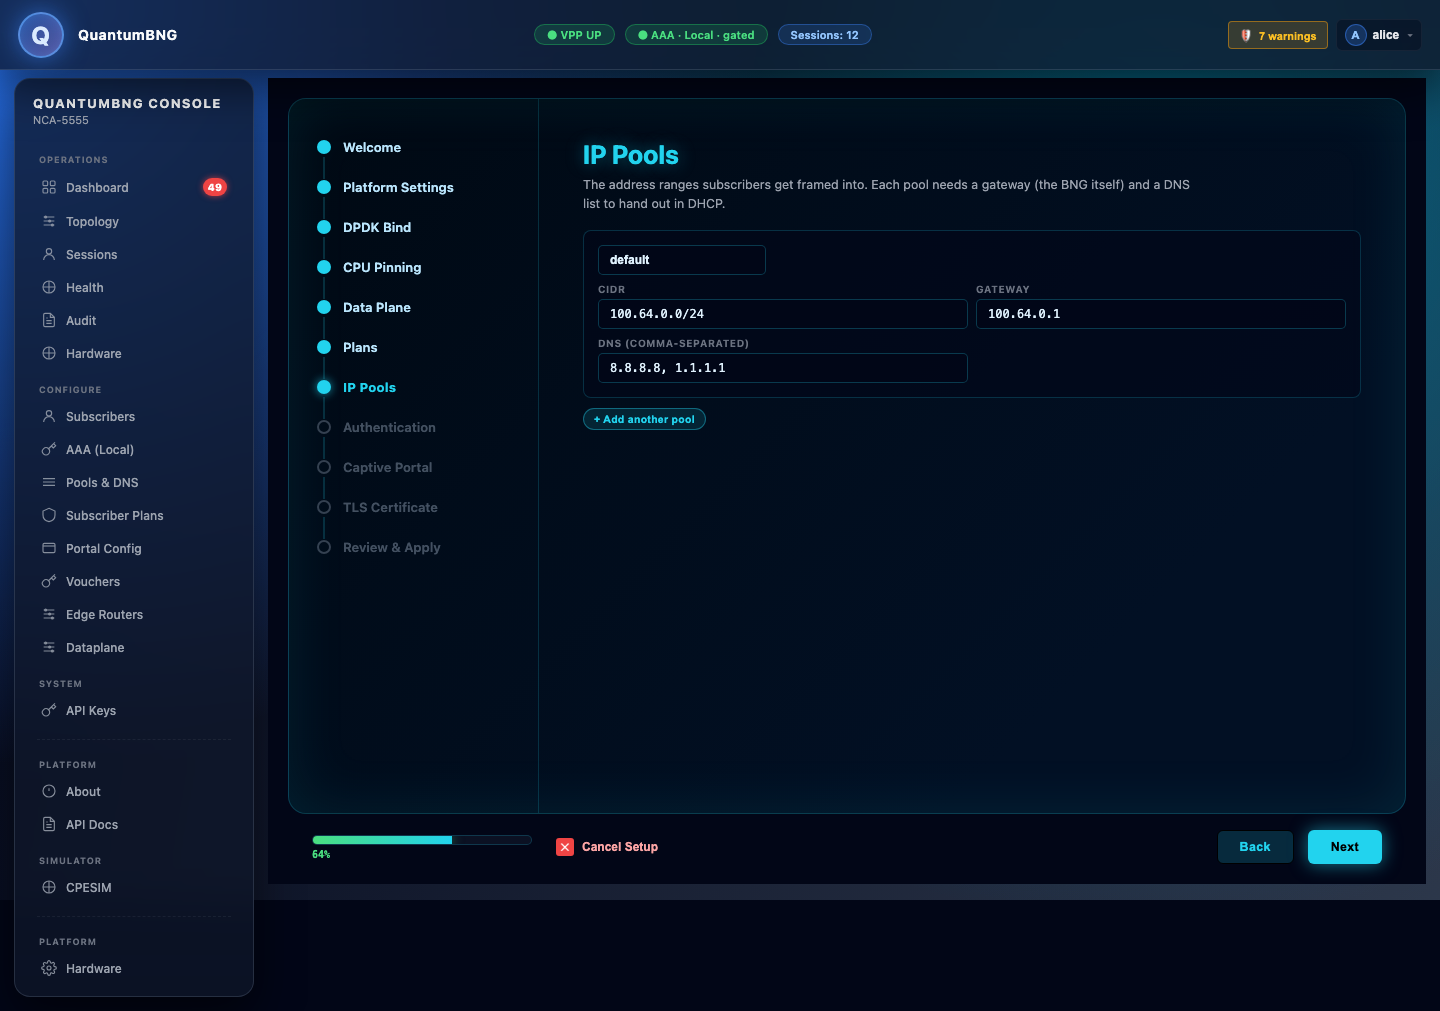
Step 7 — IP Pools
Define at least one DHCP pool. Each pool needs a CIDR (range), a Gateway (the BNG's own IP inside that range — usually .1), and a comma-separated DNS list to hand out as DHCP Option 6. Add more pools if you need per-plan or per-VLAN separation.
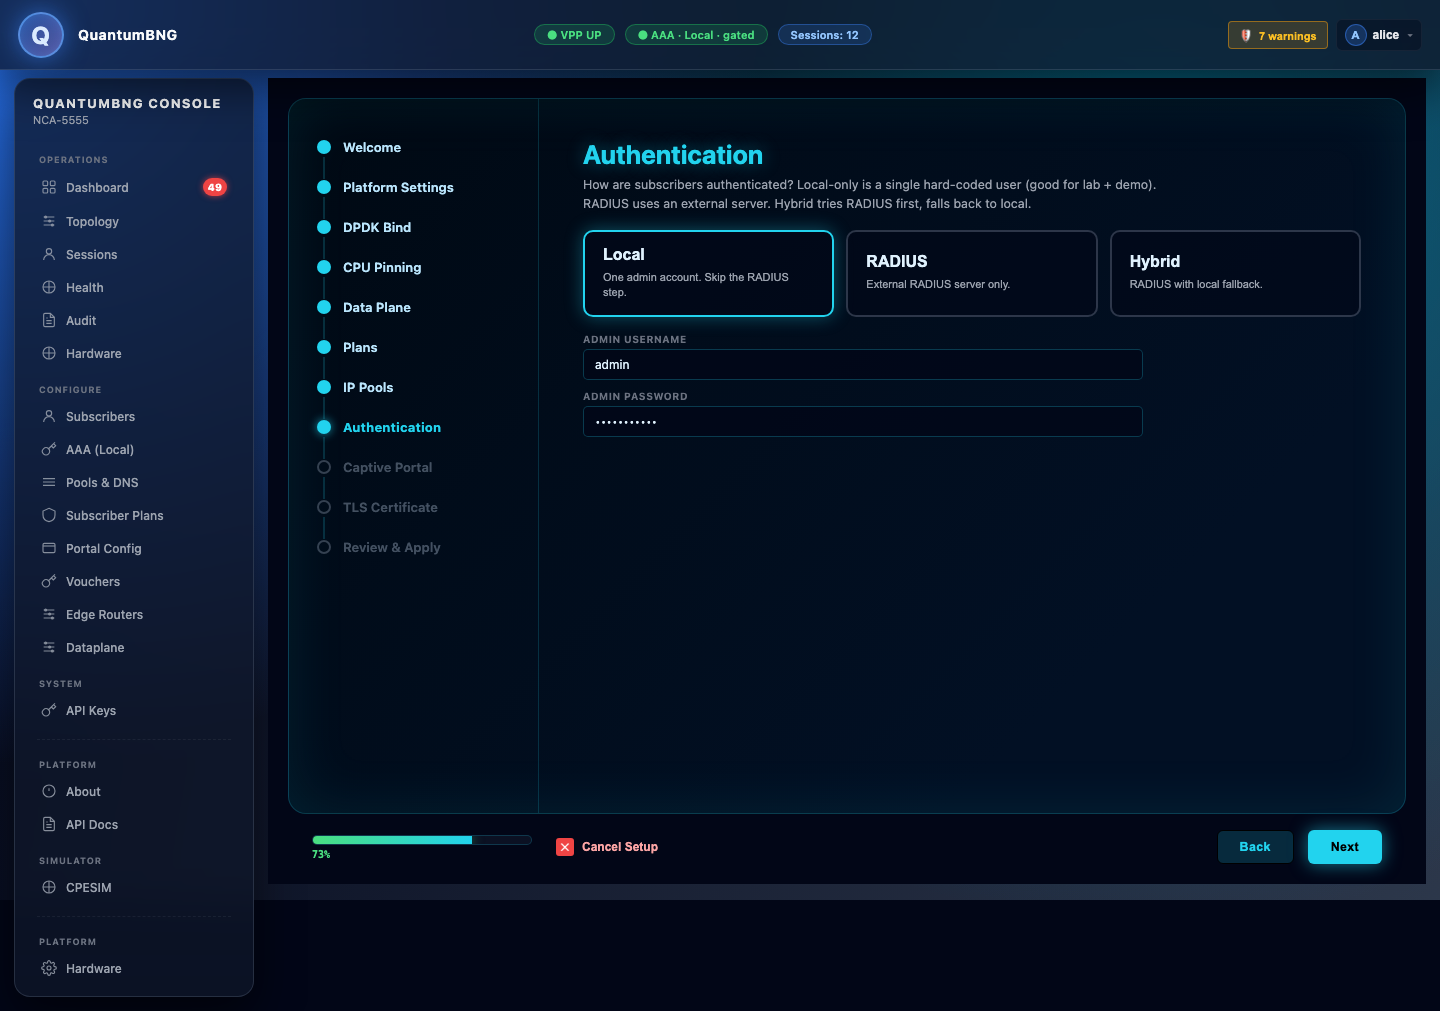
Step 8 — Authentication
Pick Local (one admin account, all subscribers auto-admitted — fine for a lab or single-site demo), RADIUS (external RADIUS server only), or Hybrid (RADIUS with local fallback). If you pick RADIUS or Hybrid, the wizard inserts an extra RADIUS-server step here (host, port, shared secret) before continuing. Under Local, fill in the admin username and password you'll log in with going forward.
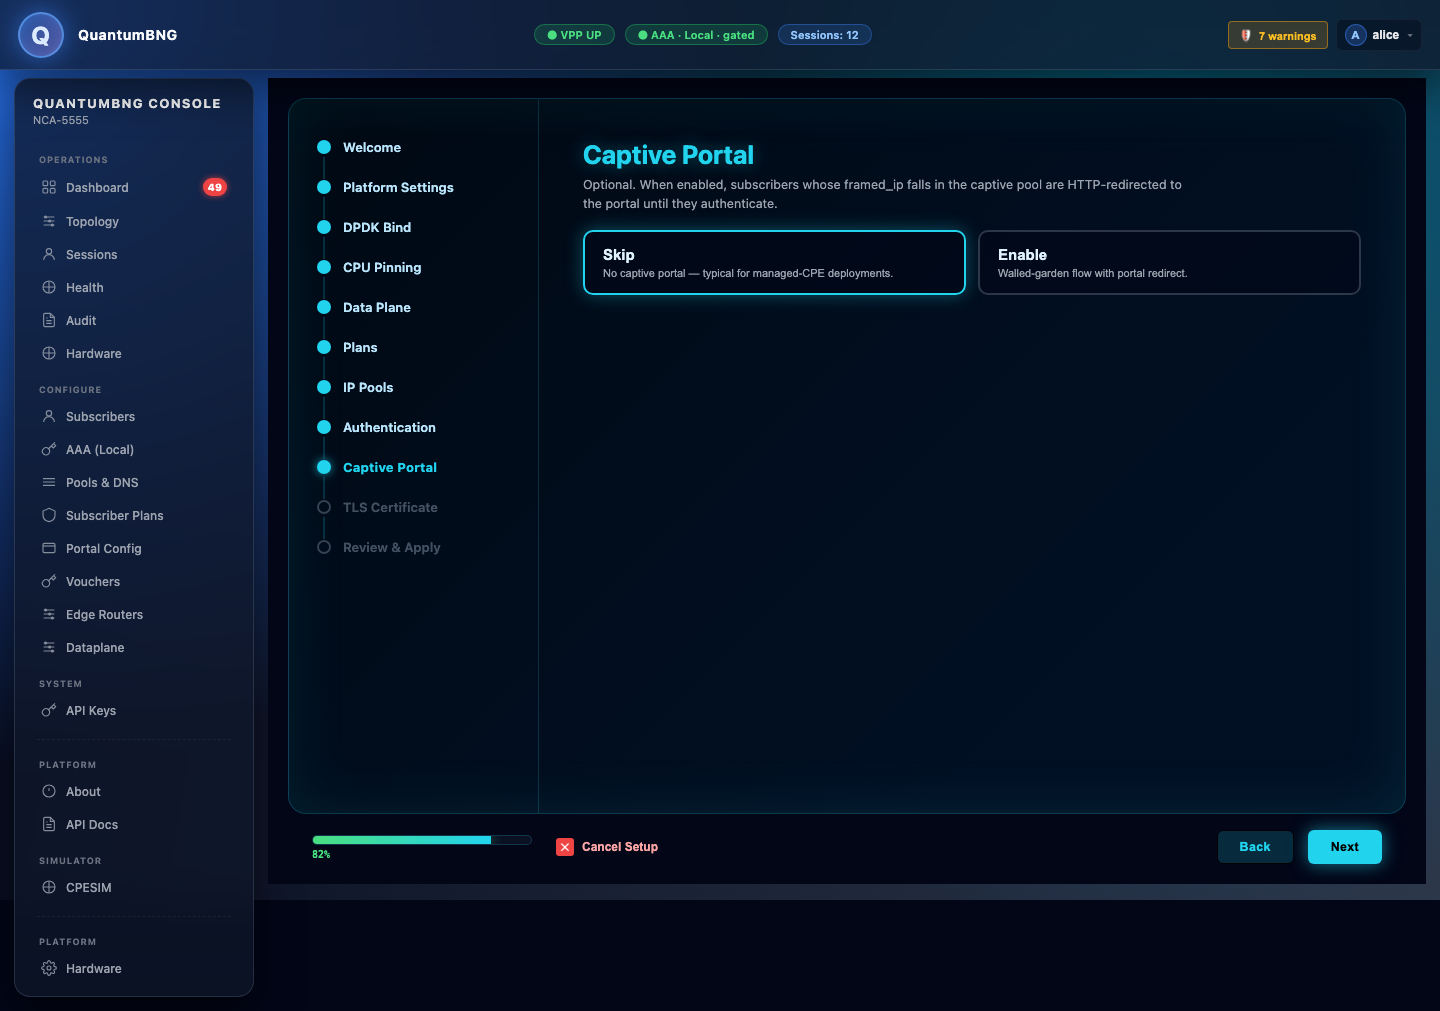
Step 9 — Captive Portal (optional)
Enable this only if you're running gated admission — i.e., unauthenticated subscribers should land on a captive portal before getting Internet. Provide the portal IP and a separate CIDR for captive-state sessions. Skip if you're running open admission.
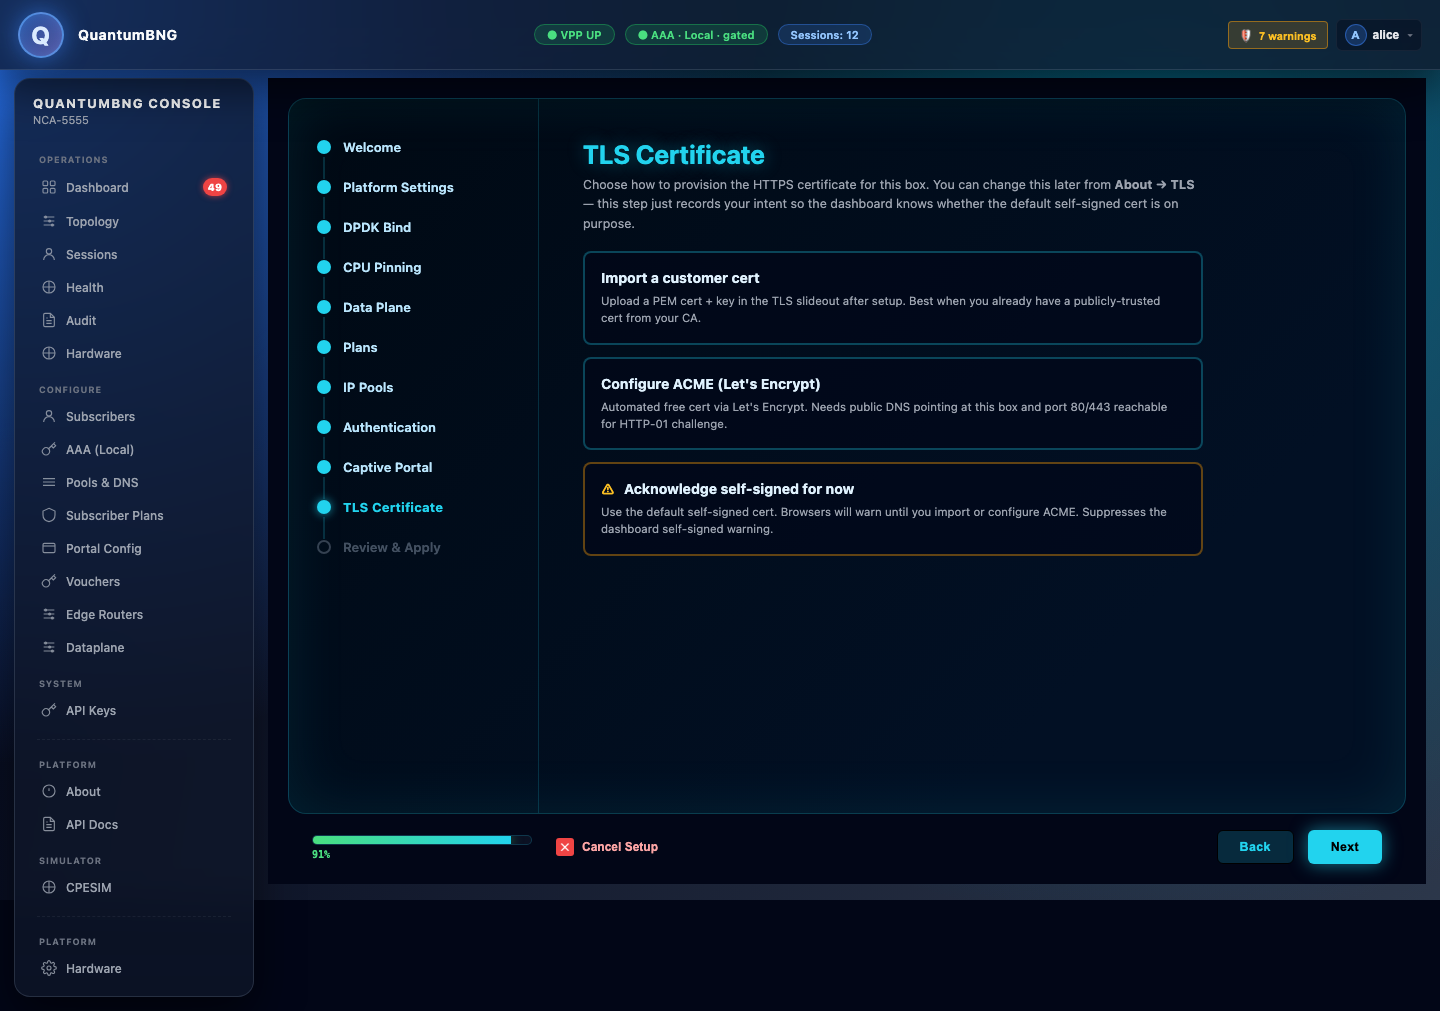
Step 10 — TLS Certificate
The webui is served over HTTPS on port 8443. The install already generated a self-signed cert; upload a real cert here if you have one, or leave it as-is and address it later via letsencrypt-on-bng.md.
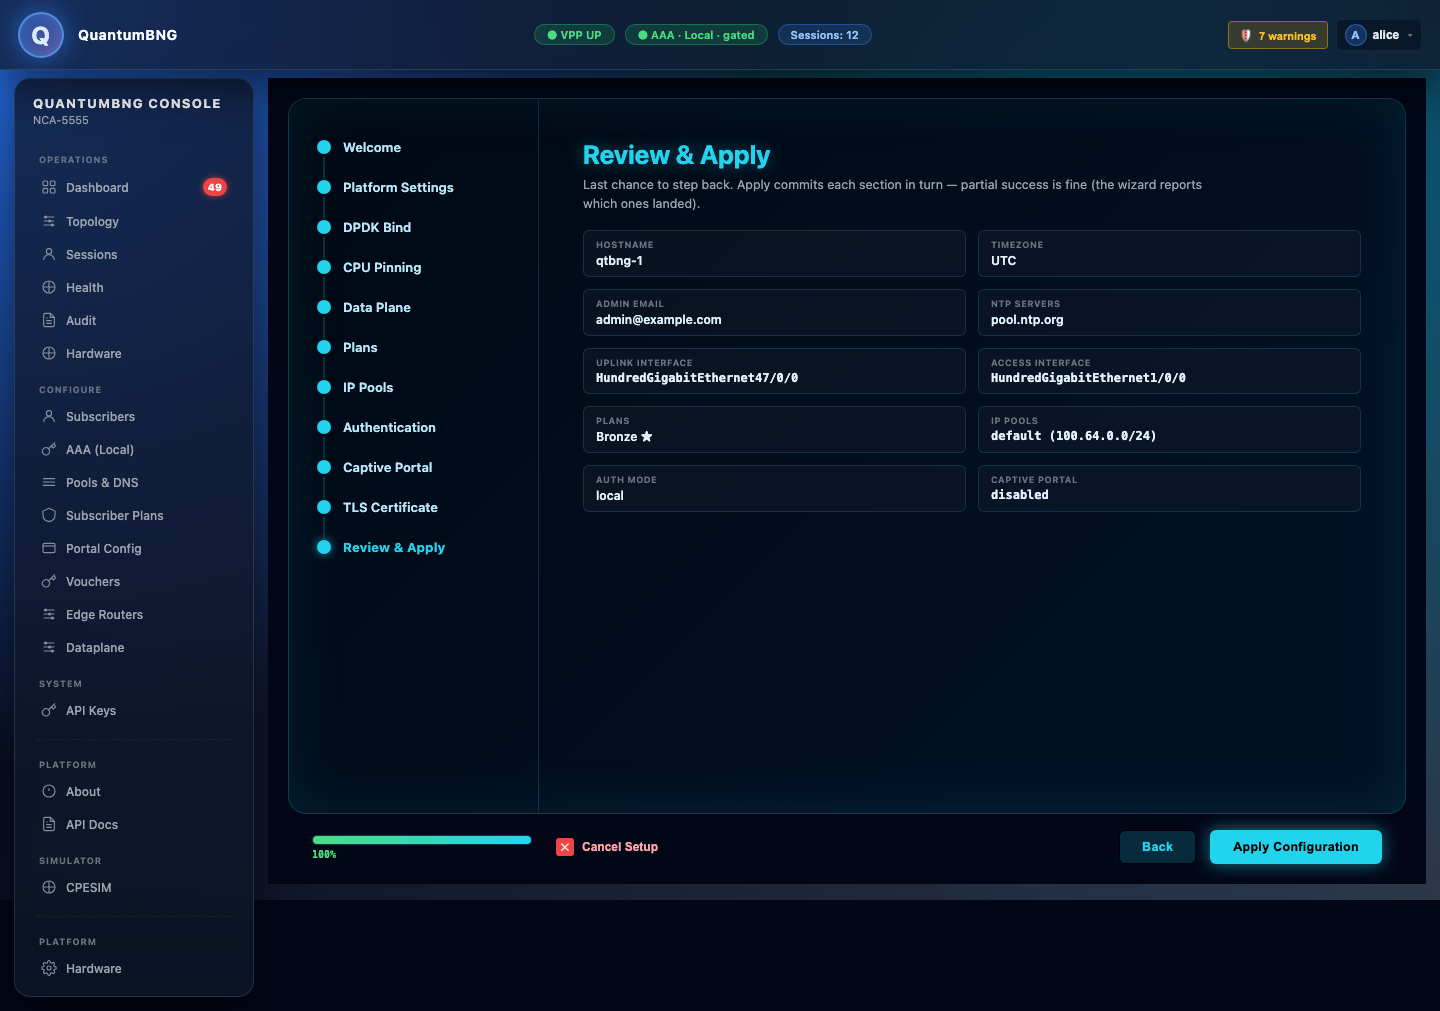
Step 11 — Review & Apply
Full summary of everything the wizard is about to commit. Read each row — this is the last chance to step back. Click Apply Configuration and the wizard commits each section in turn; partial success is fine (the wizard reports which sections landed and which didn't).
After the wizard, you're on the main dashboard:
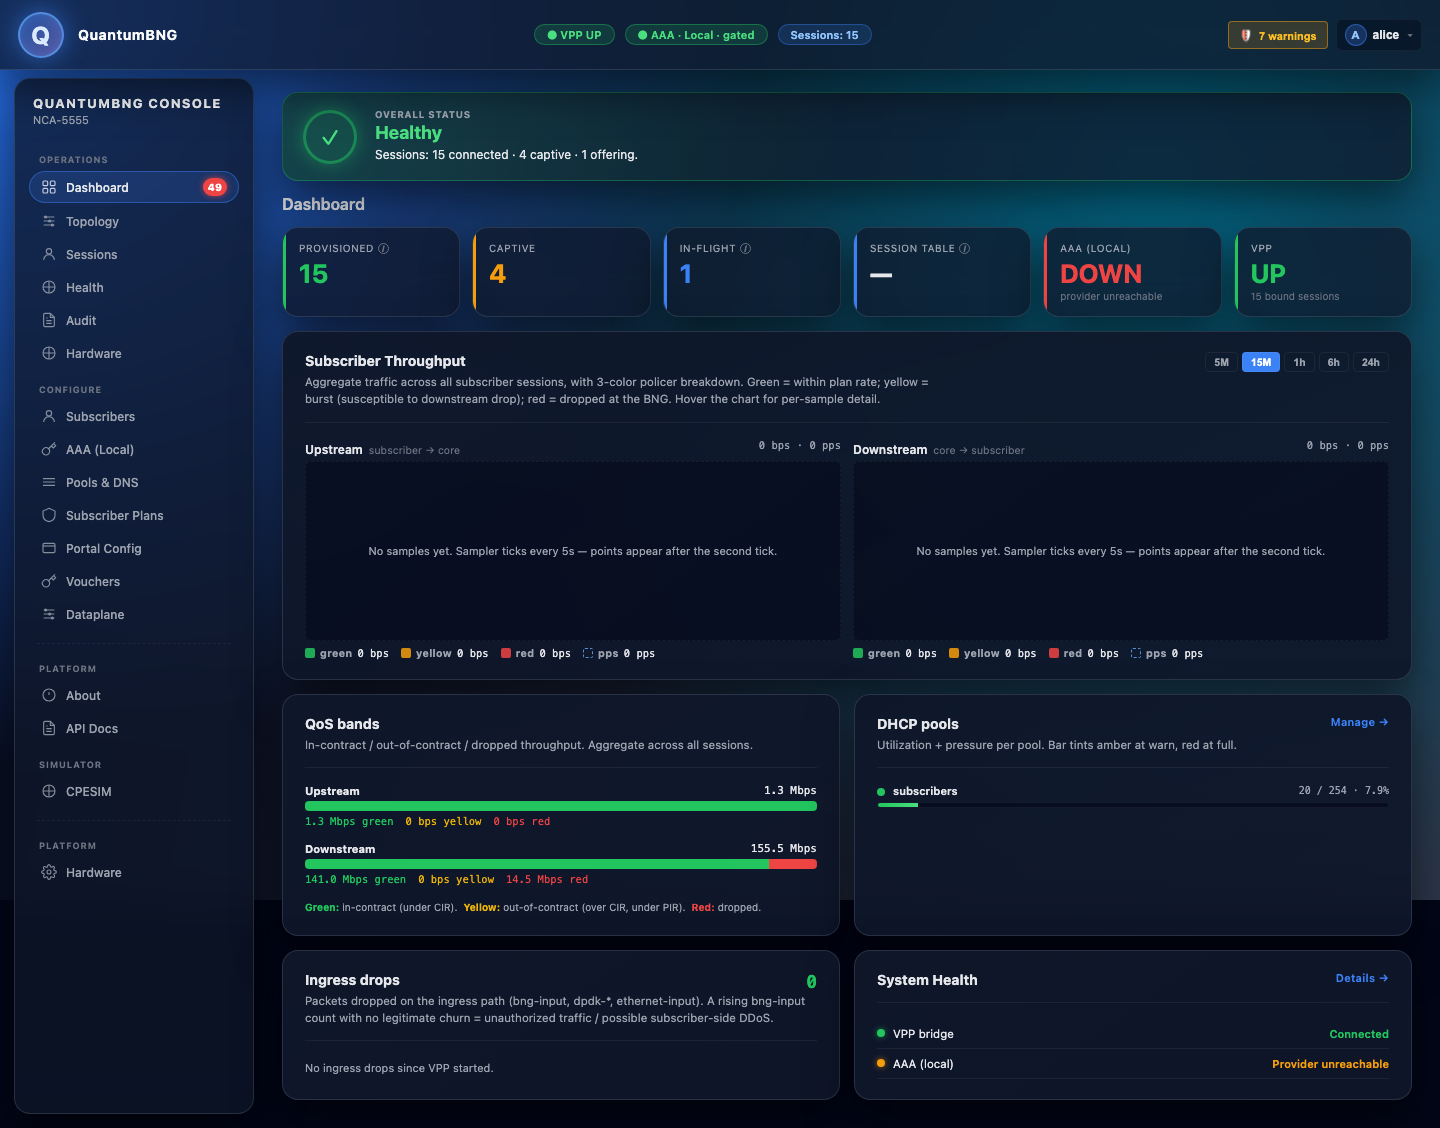
The header pills (VPP / AAA / Sessions) are your live health snapshot. If VPP is UP, AAA is Local · gated (or open), and Sessions is a number (even zero), the box is ready to serve subscribers.
6. Verify a subscriber onboards
Plug a real DHCP client into the subscriber-facing port (a laptop, another test router). Watch the Sessions panel:
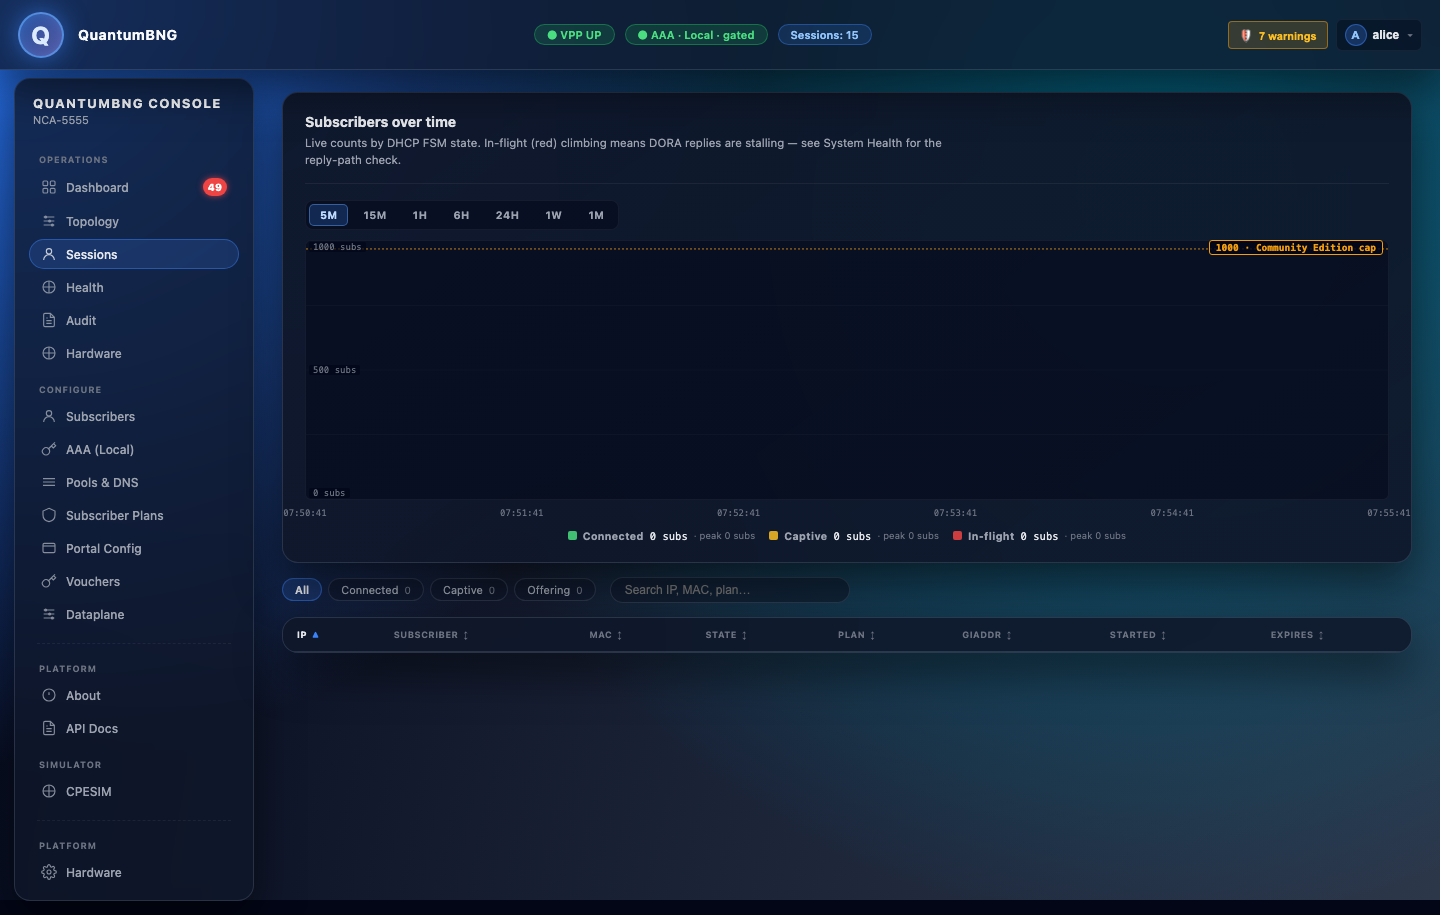
Within a few seconds you should see a new row: framed IP, MAC, plan, session state CONNECTED. If you see it, DHCP → AAA → session install is end-to-end working. Ship the box.
If the client gets no IP:
| Check | Command |
|---|---|
| Was the DISCOVER received? | sudo vppctl show int host-<access-interface> — RX packets should climb. |
| Did the controller see it? | sudo journalctl -u quantum-controller -f — look for onDiscover. |
| Is the punt socket alive? | sudo vppctl show errors — ip4-udp-punt-socket Socket TX errors mean vpp-bridge lost the socket; sudo systemctl restart vpp-bridge fixes it. |
| Is the pool exhausted? | Dashboard → DHCP pools panel. If bar is red, add capacity via Pools & DNS. |

More detail in the troubleshooting section of the user guide.
7. Optional — install CPESIM for a demo without real subscribers
If you want to see the dashboard populated (traffic charts, session counts, QoS bands) without wiring real hardware, install the CPESIM plugin from the About → Toybox panel:
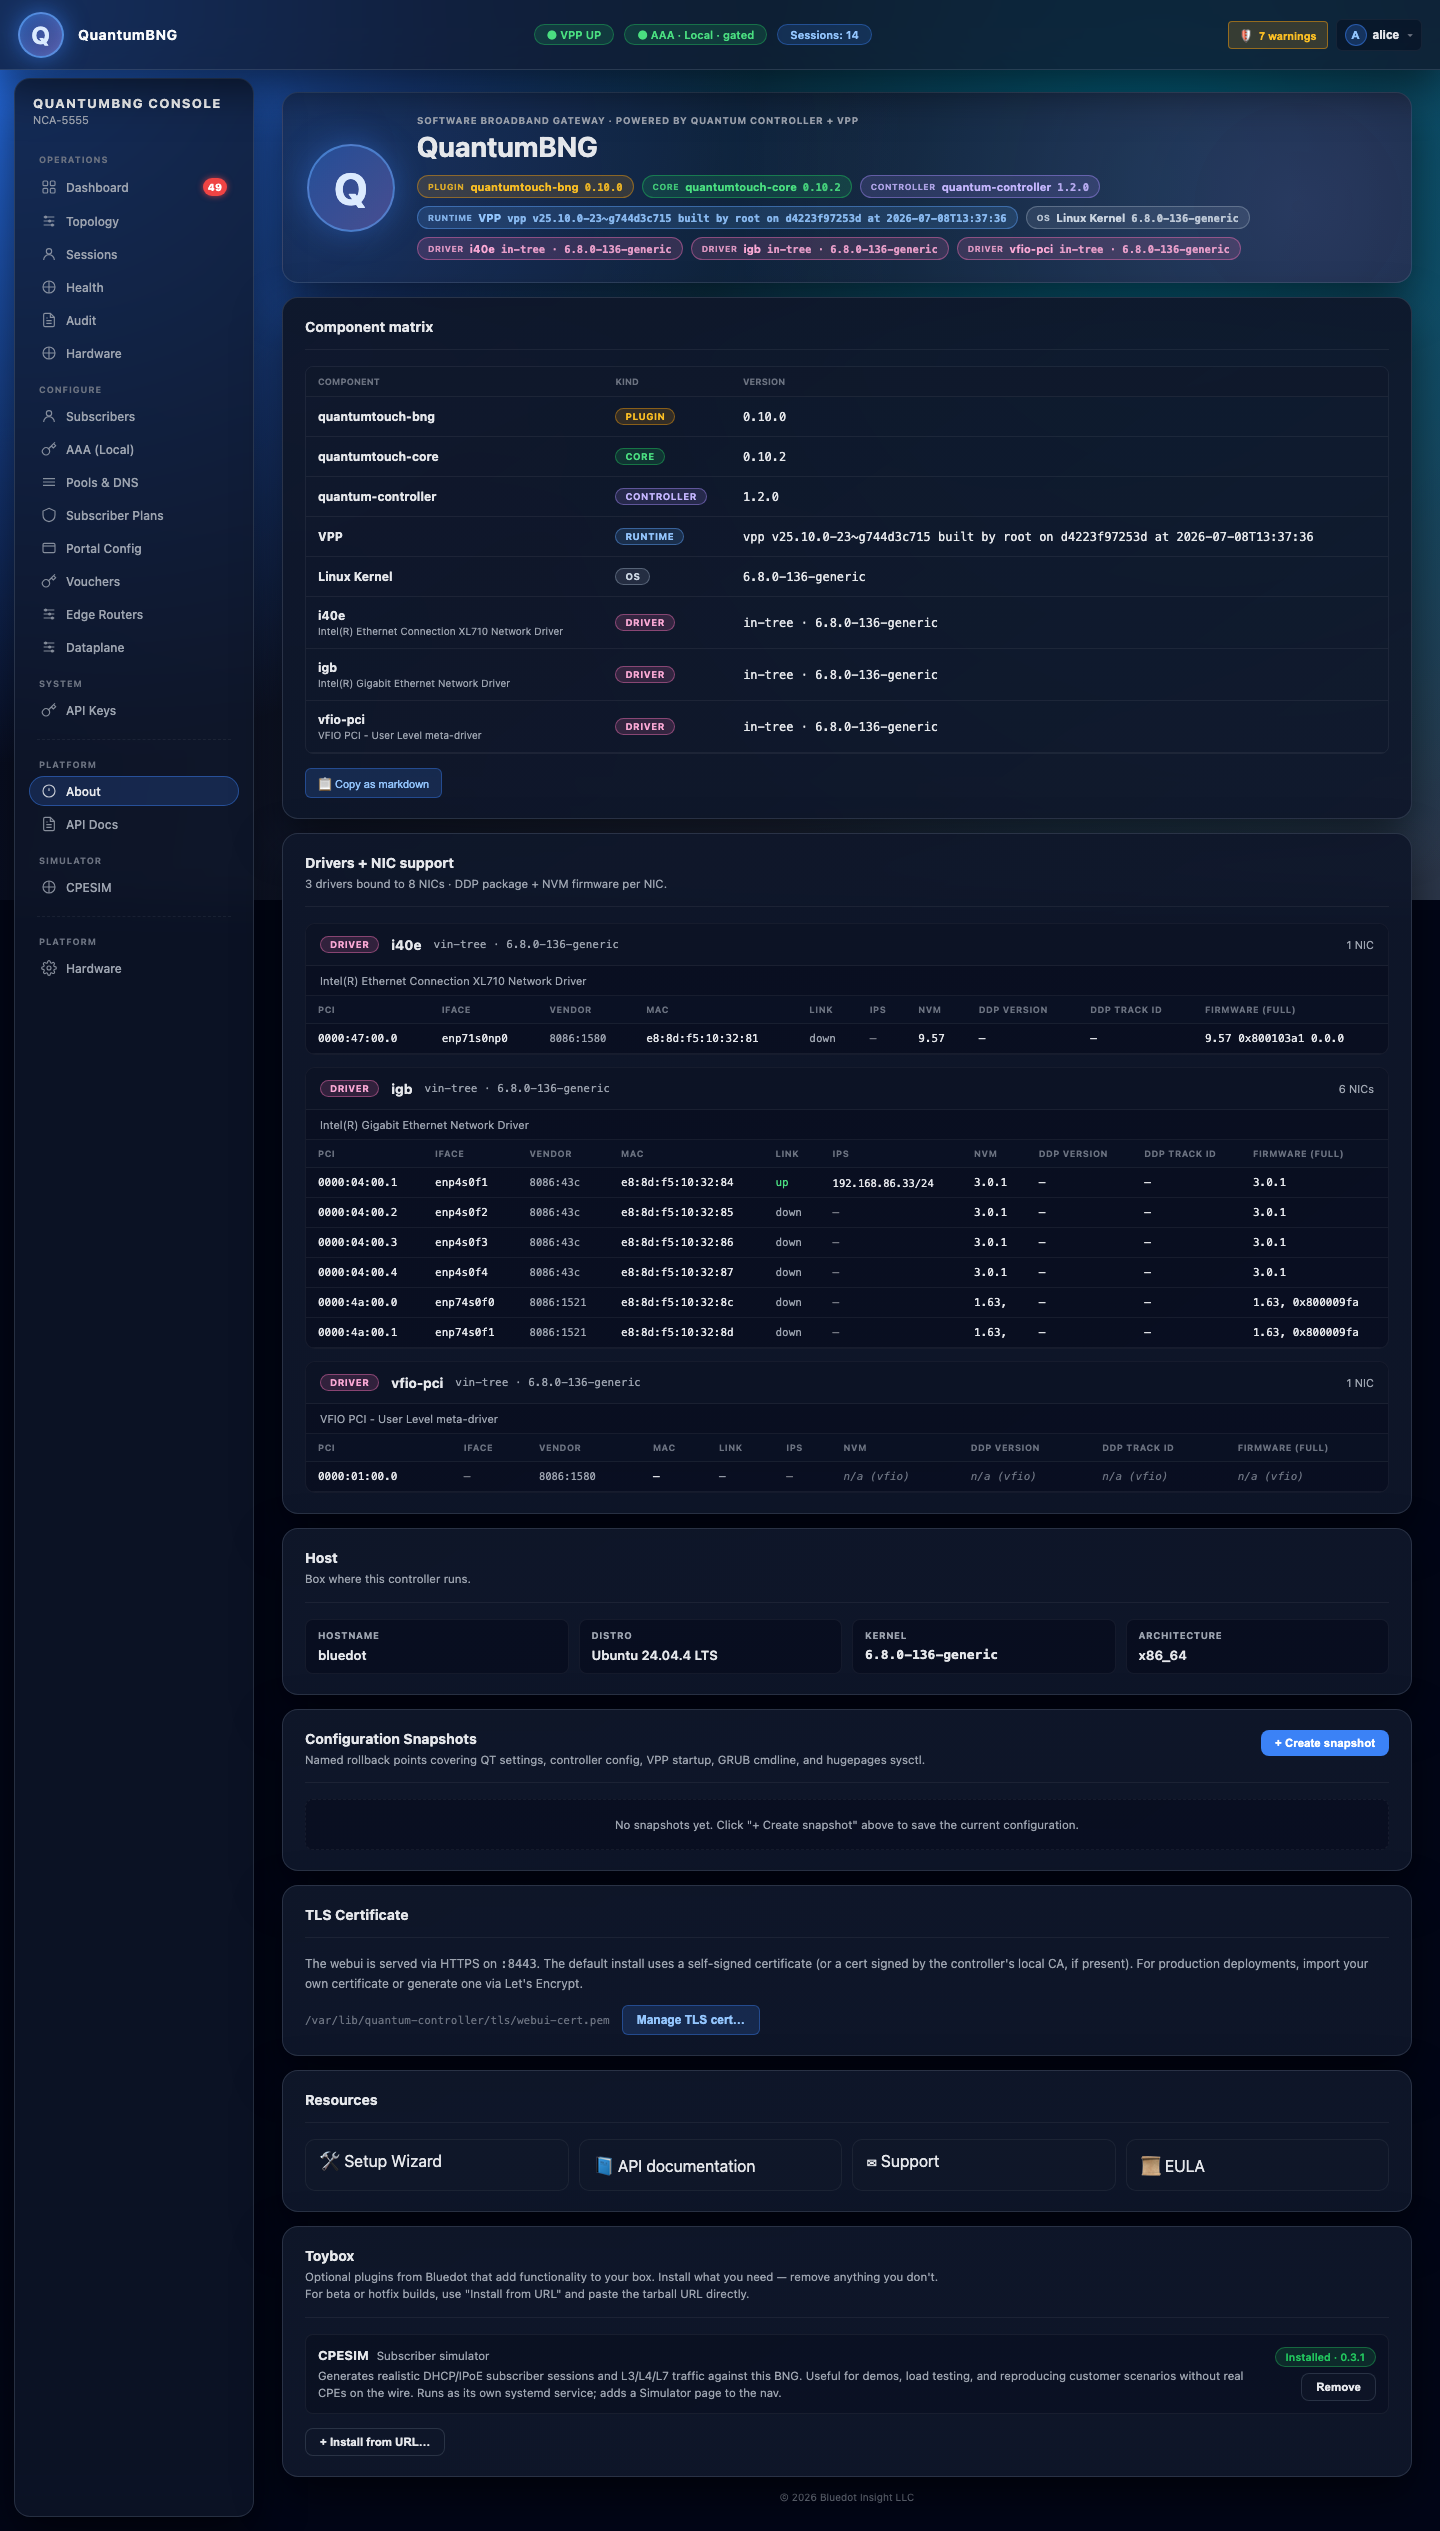
Click Install on the CPESIM row. The install takes ~30 seconds (downloads the tarball, verifies SHA, unpacks to /opt/bng-demo, registers the systemd unit).
Then go to CPESIM in the left nav:
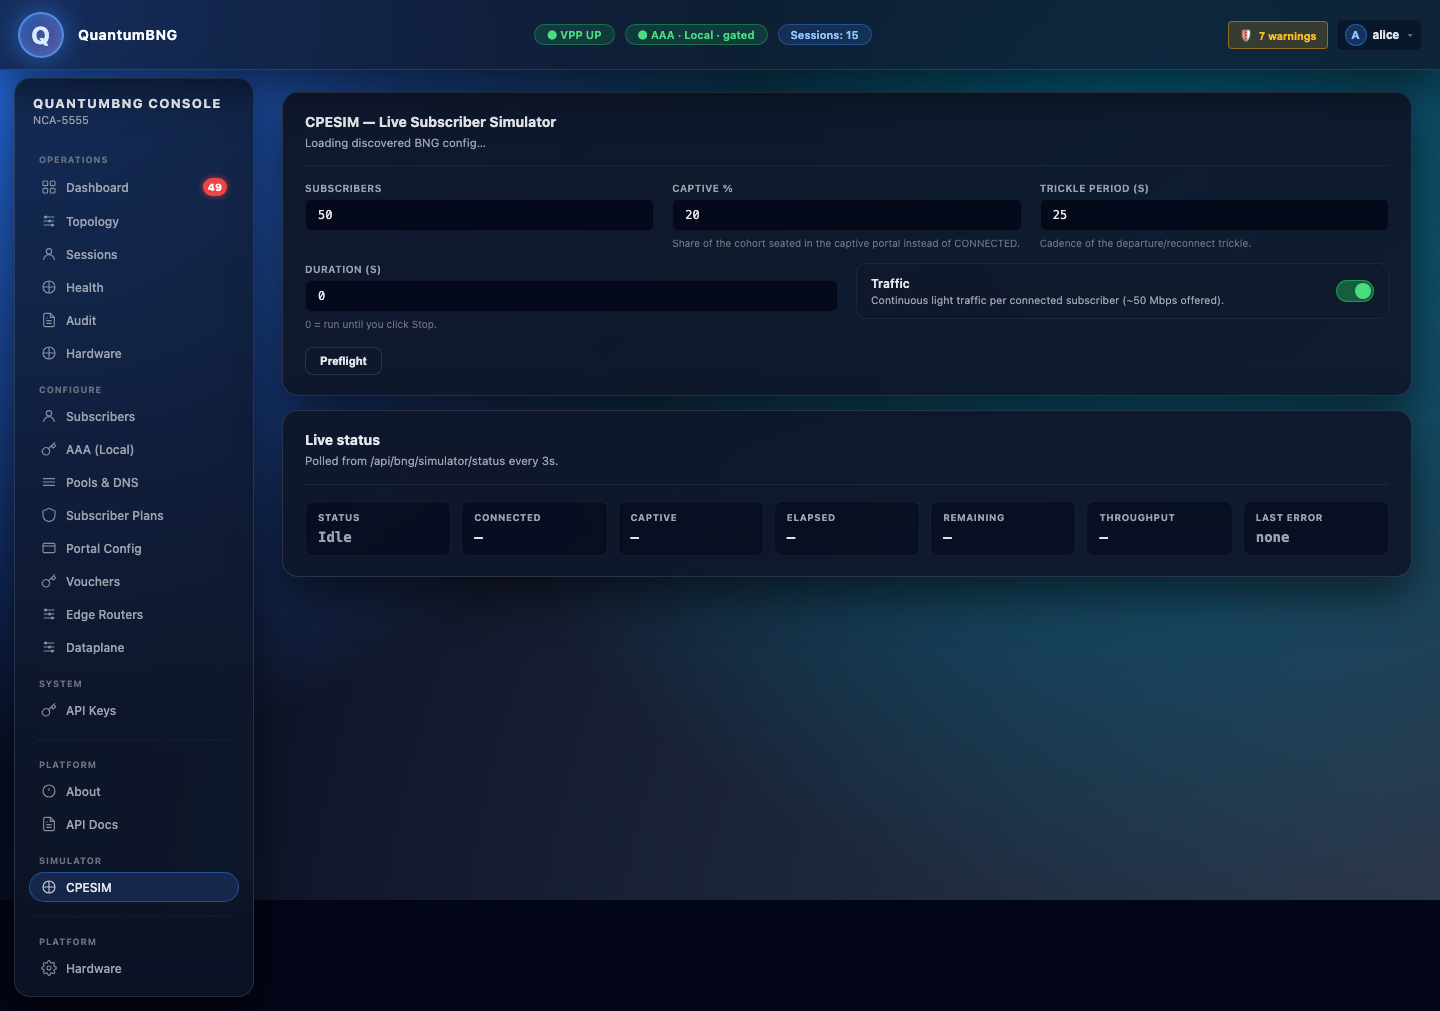
Click Start. Within ~60 seconds you'll have 50 simulated subscribers (10 in the captive portal) generating real DHCP + HTTP video traffic through your BNG. The dashboard's throughput chart and QoS bands will populate.
Click Stop when done. Click Reset simulator (admin-only button) if the engine ever gets stuck.
8. Rotate the bootstrap admin key
Once you've minted per-operator API keys via the webui (Settings → API Keys), rotate the bootstrap key so it can't be reused:
sudo /opt/bng-deploy/bin/rotate-controller-key.shThis mints a fresh internal key for the shim to talk to the controller and invalidates the old bootstrap key. Any operator-minted key stays valid.
9. Next steps
- Read the user guide for the per-panel walkthrough, common operator tasks (add plan, change rate, disable subscriber, backup/restore), and troubleshooting.
- Bookmark the API docs —
https://<box-ip>:3000/redoc.htmlon the box (behind the same self-signed cert). - Set up backups —
/opt/bng-deploy/bin/qt-auth-backup.shwrites an encrypted bundle of users + keys + config. Schedule it in cron. - Wire real TLS — see
letsencrypt-on-bng.mdfor the ACME flow. - Set up monitoring — Prometheus scrapes
/metricson port 8443 with the scrape key at/opt/quantumtouch/etc/scrape-token. Rotate withsudo /opt/bng-deploy/bin/qt-scrape-token-rotate.
Uninstall
Fully removes bng-deploy + the controller container + all state under /opt/bng-deploy, /var/lib/quantum-controller, /opt/quantumtouch:
sudo /tmp/quantumtouch-installer-1.2.0-62/uninstall.shDocker, systemd, and the kernel are not touched — this is a package uninstall, not a system wipe.