
QuantumBNG VirtualBox Evaluation — Quick Start
A ~15 minute walk-through that gets QuantumBNG running on your laptop with simulated subscribers you can watch onboard, get IP addresses, and pass traffic — all without any physical hardware.
What you get at the end: a browser tab on your laptop showing the QuantumBNG dashboard, 50 simulated subscribers online, and real DHCP + data-plane traffic flowing between the simulator and the BNG — the same code paths that run on our production customers.
What you need
| Requirement | Minimum |
|---|---|
| VirtualBox | 7.0 or newer on Windows, macOS, or Linux |
| Free disk space | 15 GB (the OVA is ~2 GB, unpacked ~10 GB, plus swap headroom) |
| Host RAM | 16 GB (the VM reserves 12 GB) |
| Host CPU | Virtualization enabled in BIOS/UEFI (Intel VT-x / AMD-V) |
| Network | Any working internet — the OVA fetches the CPESIM subscriber-simulator plugin on demand |
Everything is bundled — no accounts to create, no license keys to enter, no external services to configure. Local admin, local IP pool, local traffic.
Step 1 — Download the appliance
The evaluation appliance is one OVA file plus a SHA-256 sidecar for on-disk integrity checking.
mkdir -p ~/quantumbng-eval && cd ~/quantumbng-eval
curl -LO https://github.com/Bluedot-Insight/quantumipoebng/releases/latest/download/quantumtouch-bng-eval-v1.2.0-62.ova
curl -LO https://github.com/Bluedot-Insight/quantumipoebng/releases/latest/download/quantumtouch-bng-eval-v1.2.0-62.ova.sha256
shasum -a 256 -c quantumtouch-bng-eval-v1.2.0-62.ova.sha256
Expect quantumtouch-bng-eval-v1.2.0-62.ova: OK. The checksum guards against on-disk corruption; HTTPS covers transit, so this step is optional but good hygiene.
Step 2 — Import into VirtualBox
- Open VirtualBox, choose File → Import Appliance…
- Point it at
quantumtouch-bng-eval-v1.2.0-62.ova, click Continue -
Review the appliance settings on the next page — the defaults are correct:
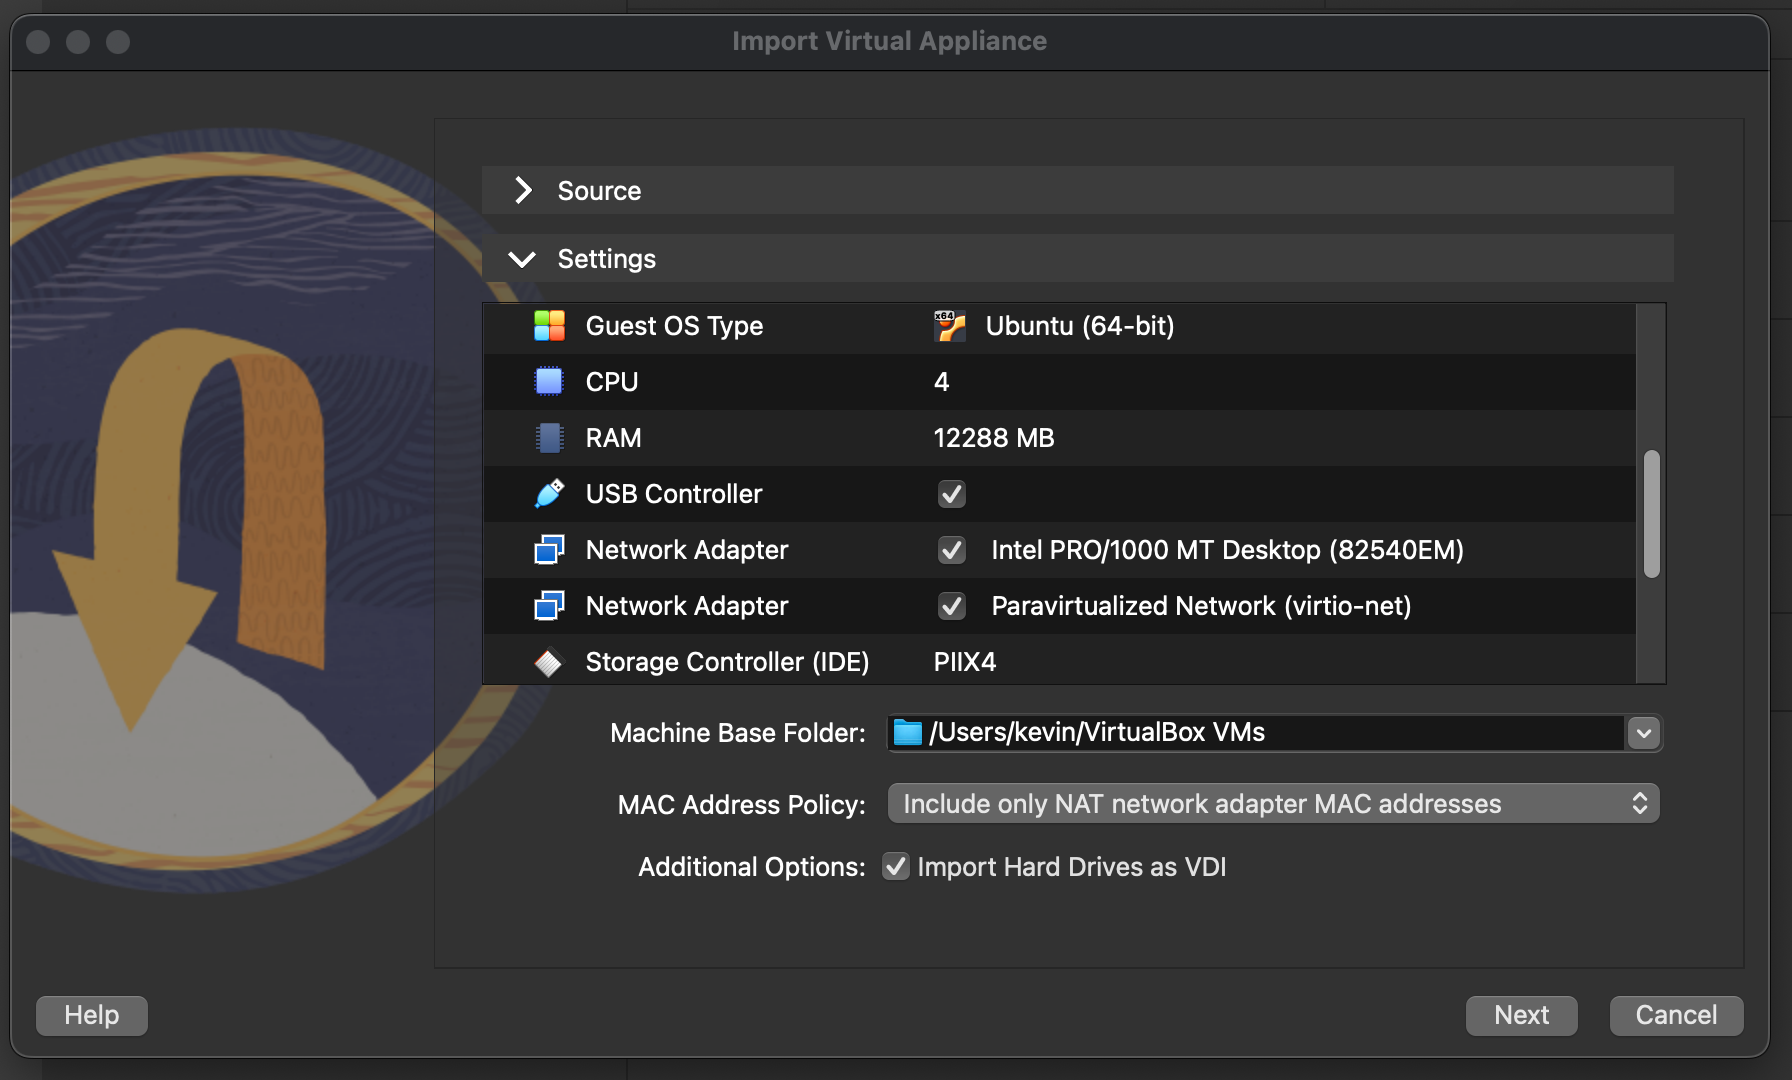
- Guest OS Type: Ubuntu (64-bit)
- CPU: 4
- RAM: 12,288 MB
- USB Controller: enabled
- Network Adapter: Intel PRO/1000 MT Desktop (NAT — this is the one with the pre-configured port forwards)
- Storage Controller (IDE): PIIX4
- Click Finish. Import runs for about two minutes.
Optional — set the console scale factor. Text on the VM console is small at 100%. Select the quantum-bng-alpha VM in the main window and use View → Virtual Screen 1 → Scale to 200% (or whatever fits your monitor). VirtualBox remembers this per VM.
Step 3 — Start the VM
Select quantum-bng-alpha and click Start. The VM boots to a text-mode console in about 60 seconds and shows a quantum-bng-eval login: prompt.
The appliance is a headless server, so you'll rarely interact with this console. Everything else in this guide happens in your browser and, if you want a shell, over SSH from your host terminal.
The OVA ships with these network ports pre-forwarded (NAT):
| Guest port | Host port | What it is |
|---|---|---|
| 22 | 2222 | SSH |
| 3000 | 3000 | Controller API + Redoc |
| 8443 | 8443 | Web UI (this guide's main entry point) |
| 8088 | 8088 | Prometheus scrape endpoint |
Nothing to configure — the port-forwarding rules are baked into the OVA metadata.
Step 4 — Open the web UI
In your browser, open:
https://localhost:8443/The appliance ships with a self-signed TLS certificate for the eval environment. Your browser will warn about this — accept and proceed. On a real deployment you'd replace the certificate with a Let's Encrypt one; that's covered in the from-scratch install guide.
You'll see the login page:
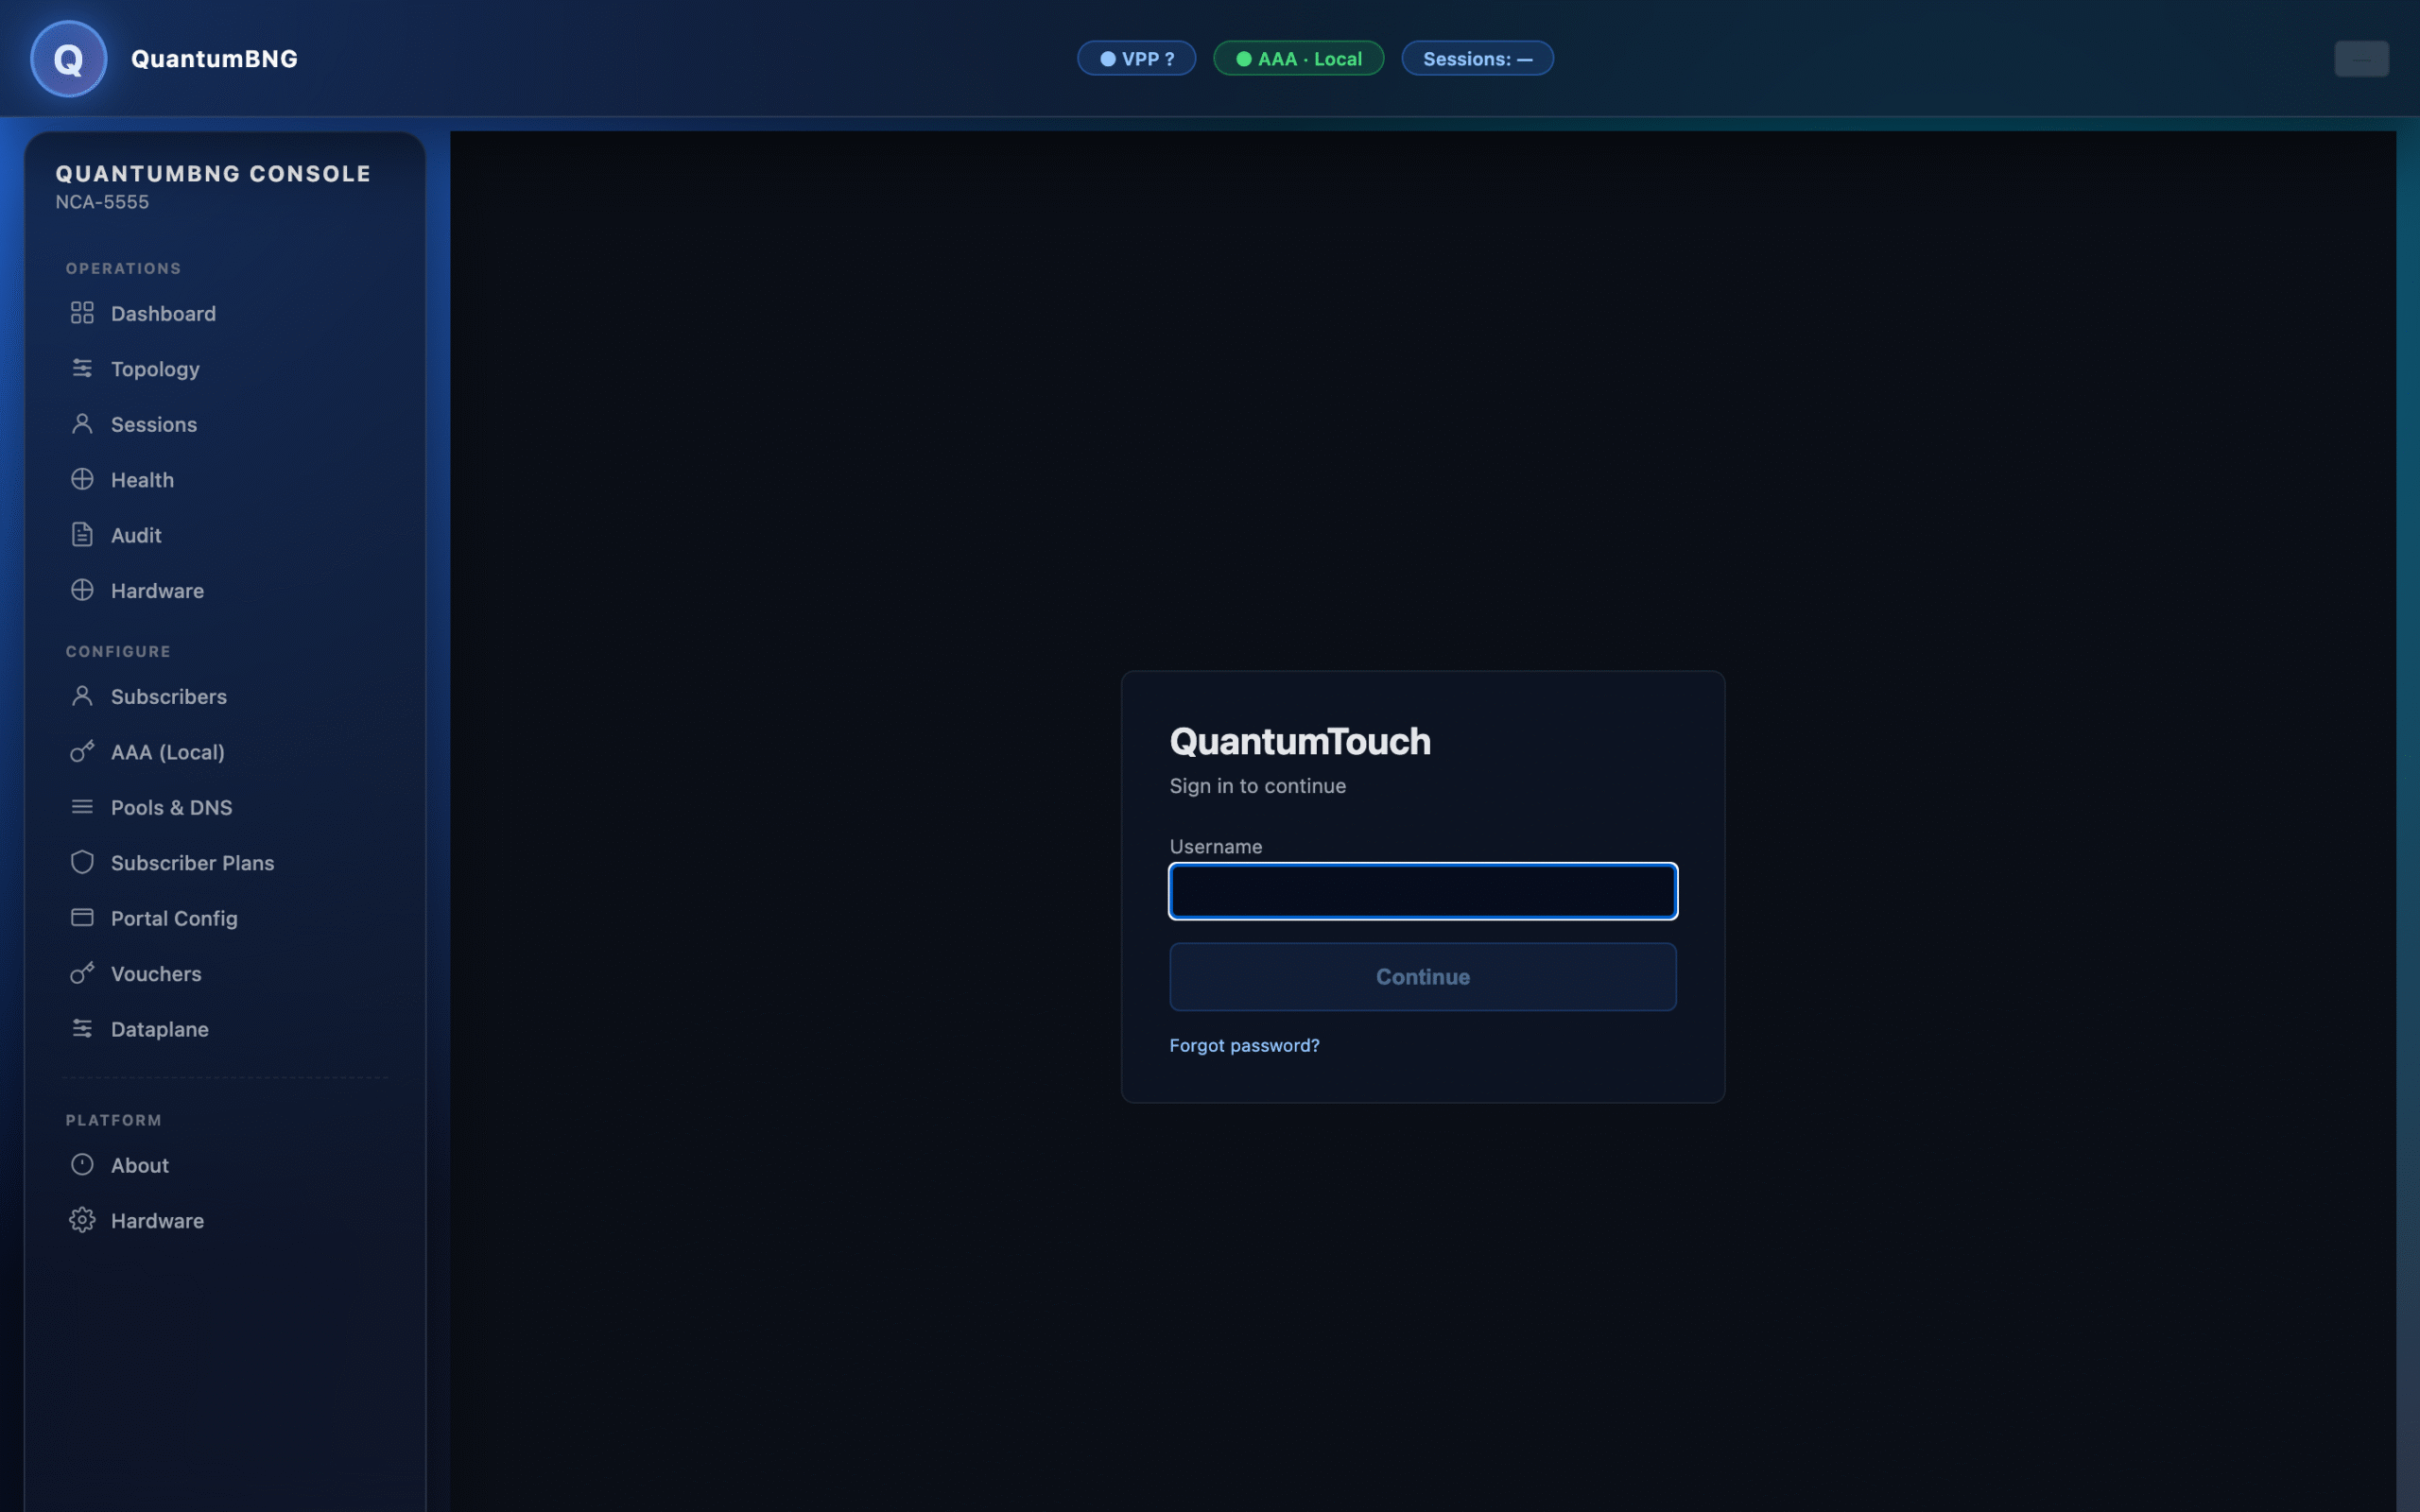
Sign in with:
- Username:
admin - Password:
BluedotEval2026
The username is entered first, then a Continue button reveals the password field — a two-step flow that makes the login flow work uniformly whether local, SAML, or LDAP is configured.
First-run task: rotate this password. Click the account menu in the top-right (your username), pick Change password, and set a new one — at least 12 characters, at least one letter and one digit. The default password is public knowledge (in this guide), so don't leave it on any box that's reachable beyond your laptop.
Step 5 — Take a quick tour
The Dashboard page is the operator's default landing spot. Nothing is happening yet — no subscribers, no traffic — so most of the counters read zero. That's the appliance behaving correctly on a fresh install.
The pages worth glancing at before we start pushing traffic (all reachable from the left-nav):
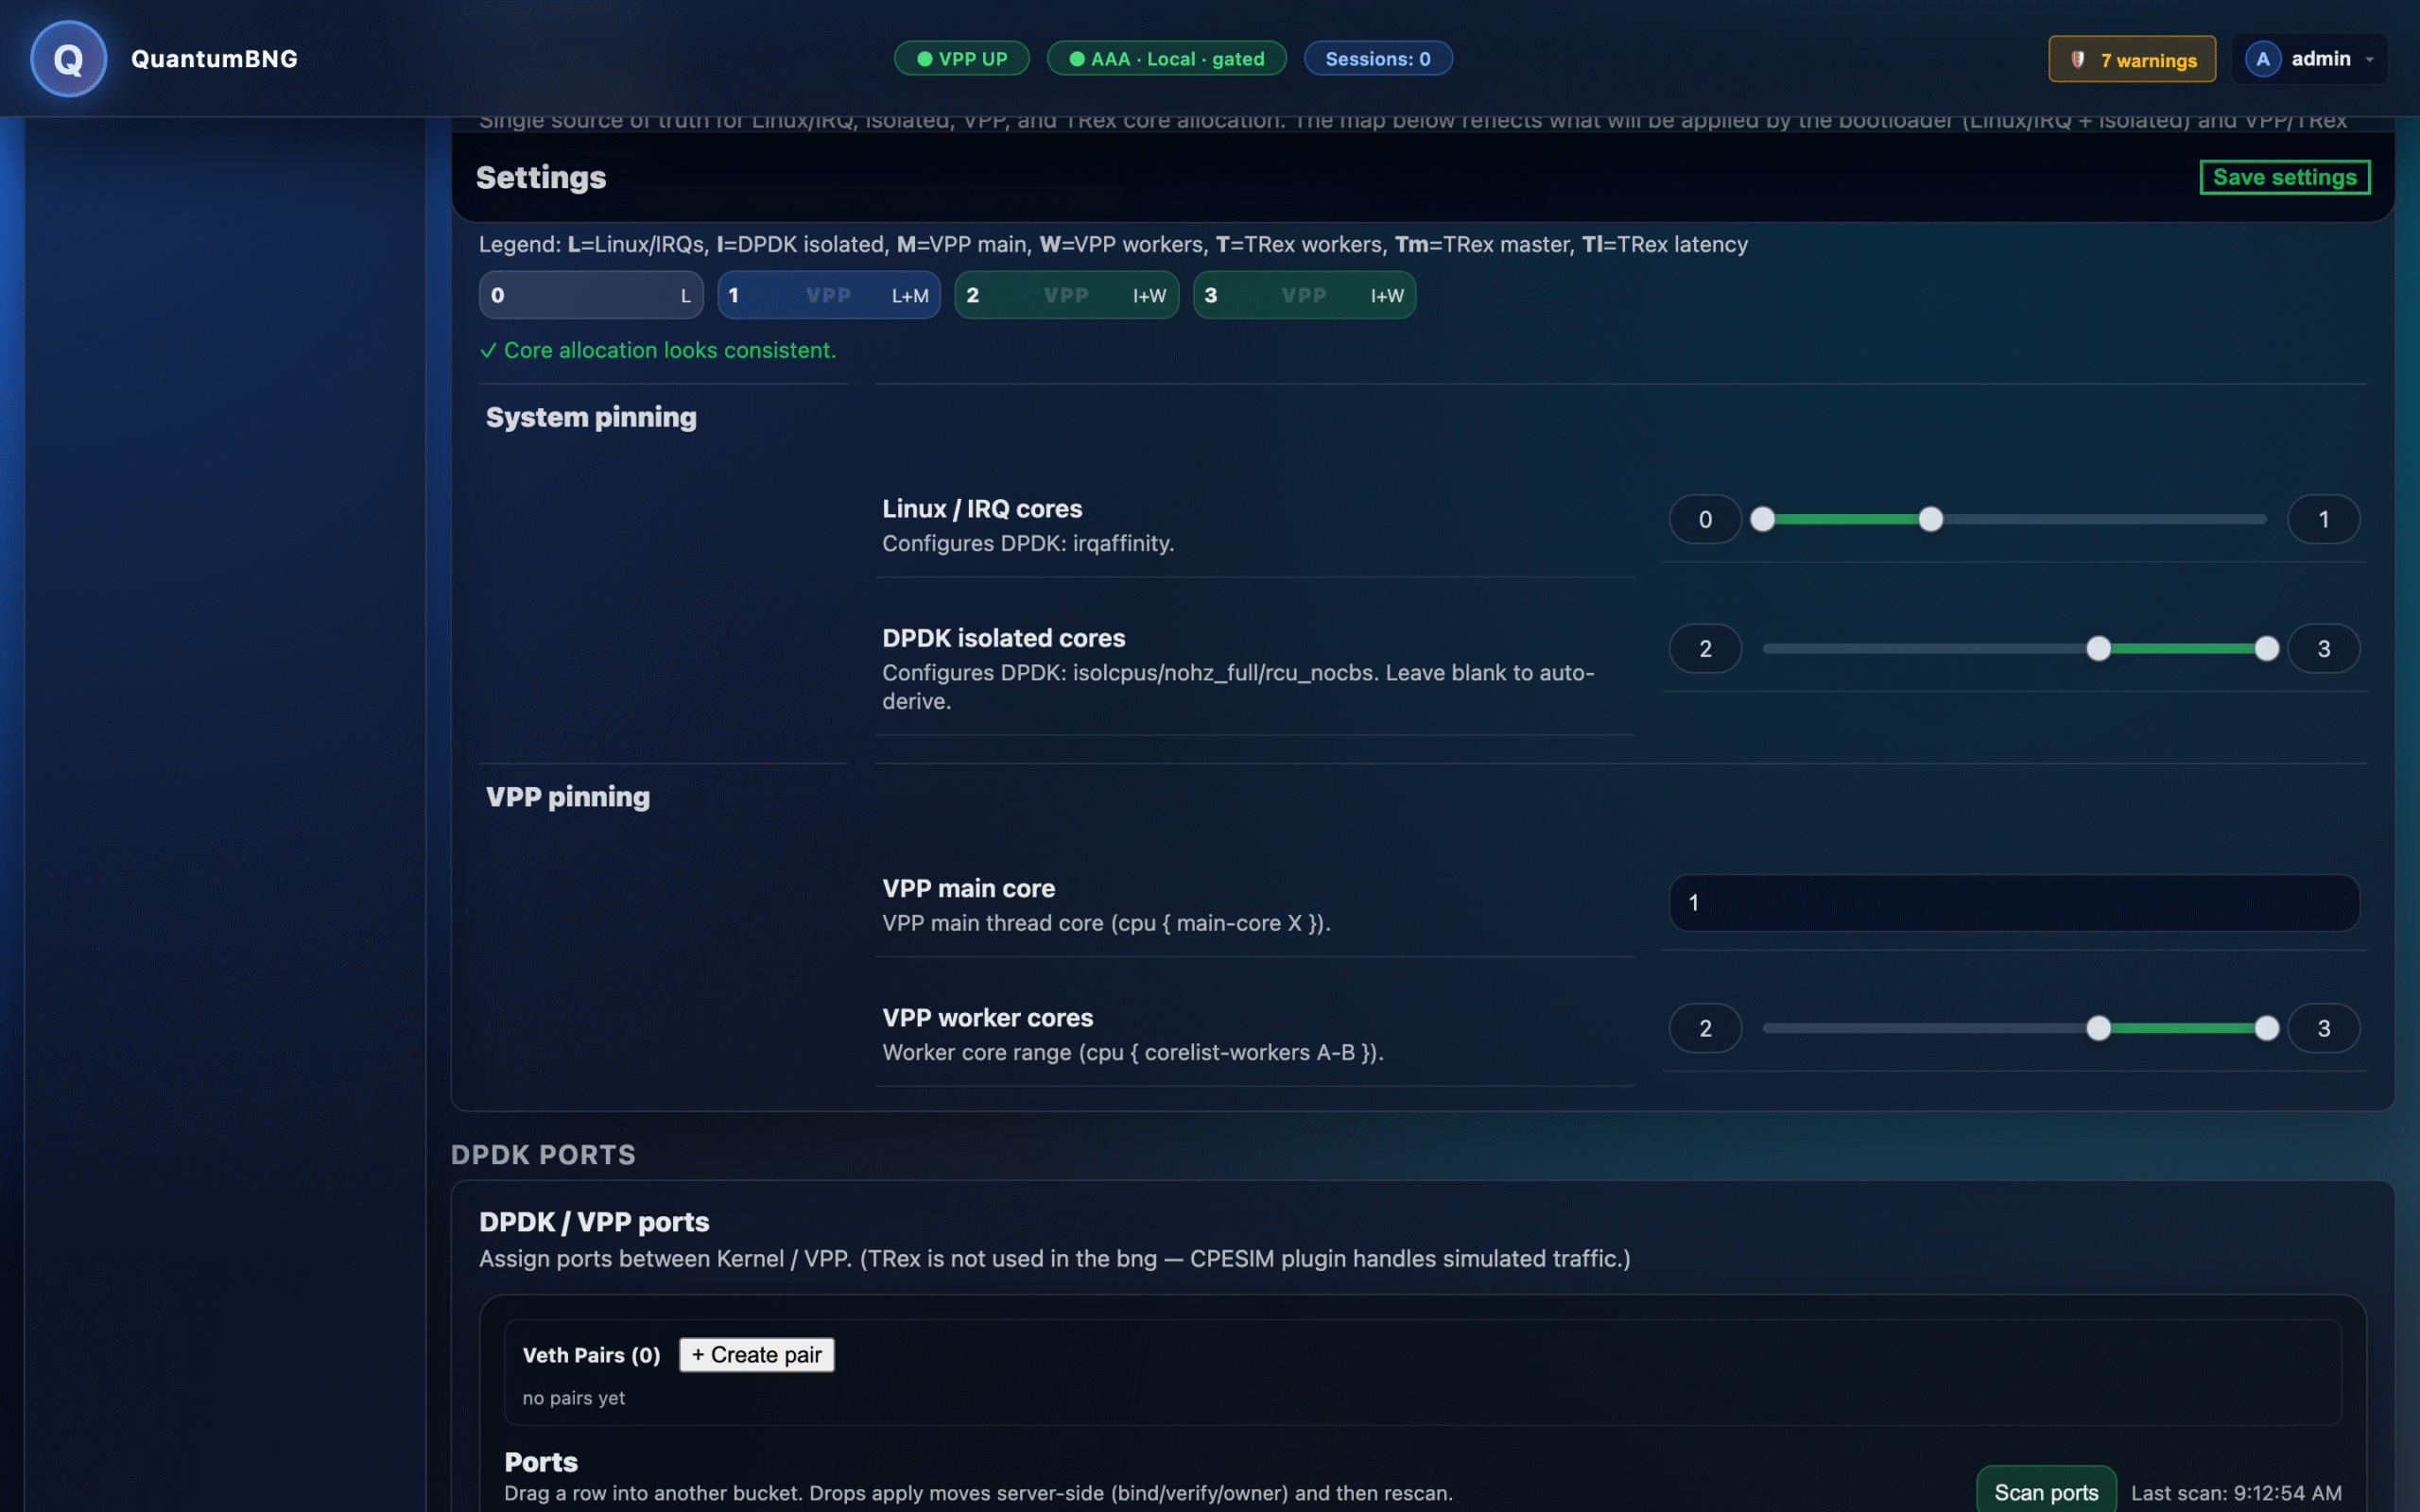
Settings → CPU Mapping. Confirms the appliance is running the four vCPUs the way the wizard configured them: Linux + IRQs on core 0 and 1, VPP main thread on core 1, VPP worker threads on cores 2 and 3, DPDK-isolated range covering the workers. The section opens with a green ✓ "Core allocation looks consistent" banner — this is what a healthy pinning configuration looks like:
Dataplane. Shows the two internal veth interfaces the wizard created for you: veth-uplink-vpp (upstream side) and veth-access-vpp (subscriber side). Because VirtualBox has no way to hand a physical NIC through to VPP, all traffic in this appliance flows through these virtual pairs — perfect for a functional evaluation, not for real throughput benchmarking.
Pools & DNS. Shows the default pool at 100.64.0.0/24. That's CGN space (RFC 6598) — the same address range real ISPs use behind their BNG. When we start CPESIM in the next step, subscribers get IP leases out of this pool.
Subscriber Plans. Shows a single Bronze service plan: 20/25 Mbps down (CIR/PIR), 10/12 Mbps up. Every subscriber gets this plan unless you build another. Traffic that fits inside CIR (committed rate) is green on the dashboard, traffic in the CIR-to-PIR burst band is yellow, and anything over PIR is dropped at the QoS meter.
Audit. The audit timeline. Everything that happened during the first-boot bootstrap is recorded here — the admin account creation, the wizard-apply for each section, service startups, and any subsequent operator actions. This is the page you'd send to Bluedot support if something goes wrong later.
Step 6 — Install CPESIM (the subscriber simulator)
The default install has no subscribers. That's realistic for a real customer, useless for a demo. CPESIM is a QuantumBNG plugin that spins up a fleet of simulated CPEs on the same box, sends real DHCP DISCOVER frames into the BNG's access-side veth, and drives real TCP downstream traffic — the same code path our regression suite uses.
Installation is a two-click flow:
- Navigate to About in the left nav
- Scroll down to the Toybox section
- Find the CPESIM card (subtitled Subscriber simulator) and click Install
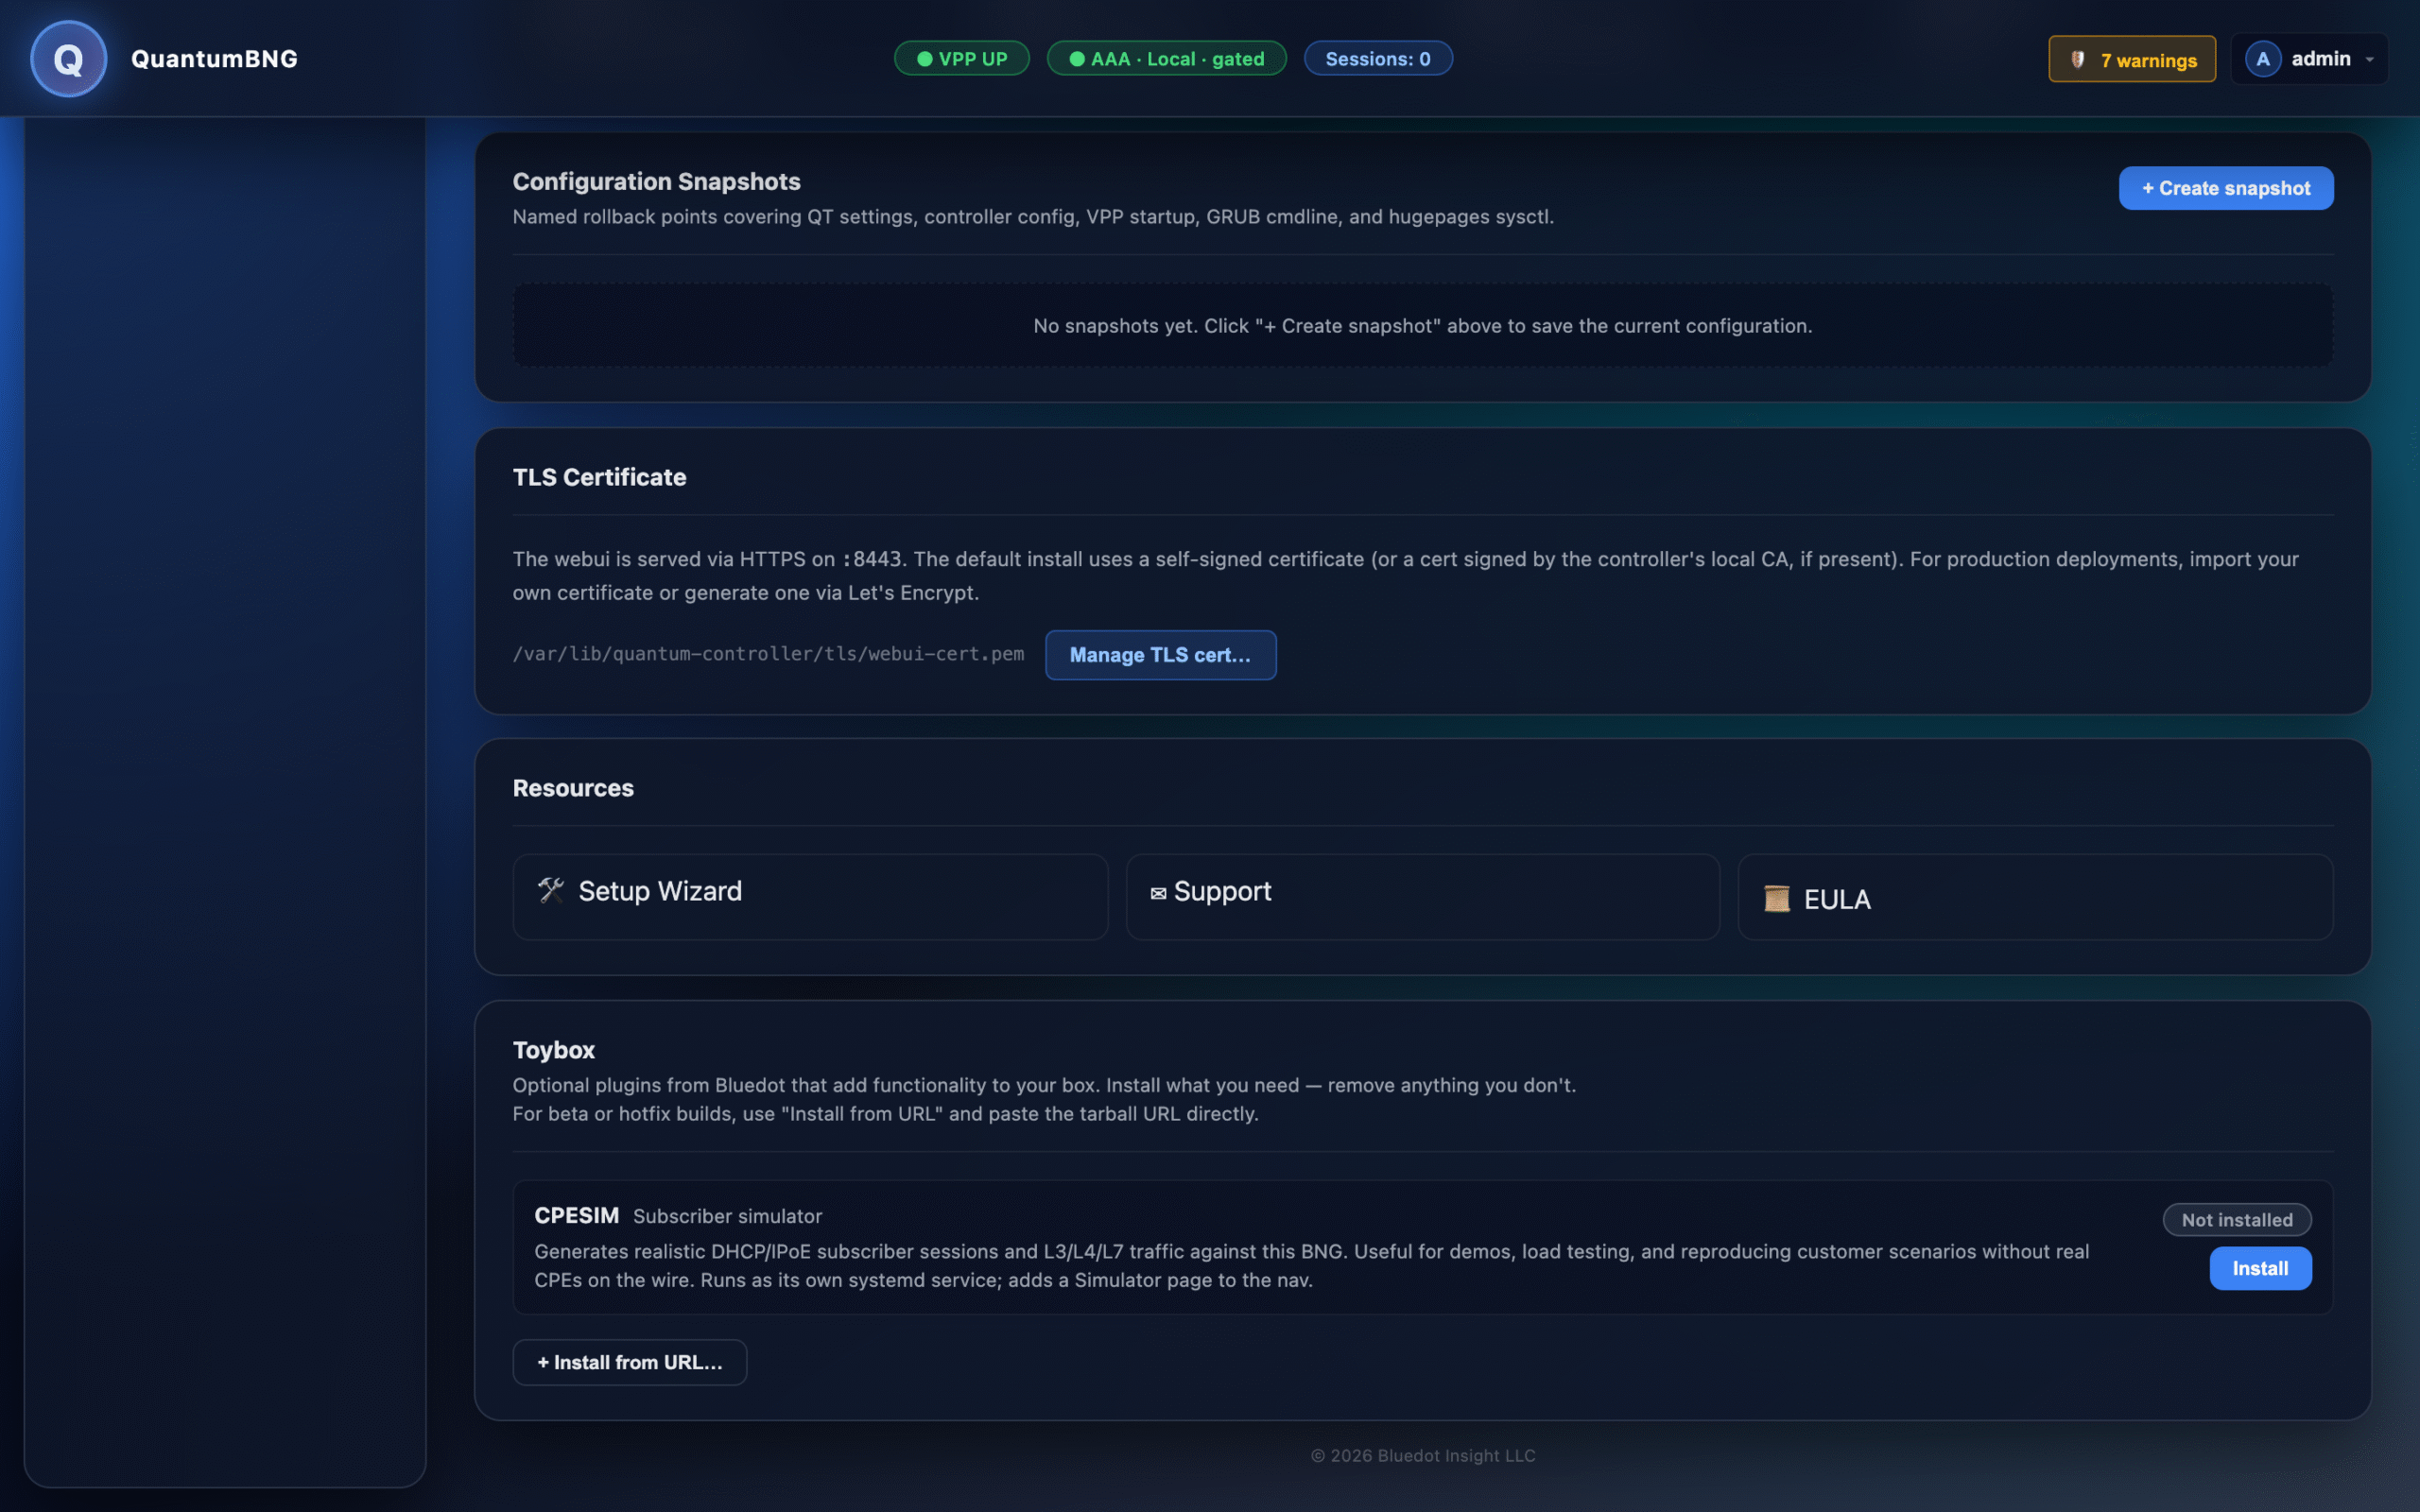
The install takes about a minute. Under the hood:
- The plugin tarball is fetched from Bluedot's public release repo
- Its SHA-256 checksum is verified against a signed manifest
- Contents are unpacked into
/opt/bng-demo/ - A systemd unit is registered so the simulator restarts on reboot
When install finishes, the card flips to Installed · with a Remove button, and a new Simulator entry appears in the left nav.
Step 7 — Run your first simulated subscribers
Click the new Simulator entry in the left nav. You land on a configuration page with three main knobs:
| Setting | Recommended | What it does |
|---|---|---|
| Subscriber count | 10 | How many simulated CPEs to spin up |
| Captive-portal ratio | 20% | Fraction of subscribers that arrive without RADIUS auth and get redirected to the walled-garden portal |
| Downstream traffic | On | Whether authenticated subscribers pull a large file (drives real bandwidth counters) |
Ten subscribers is a good starting point on a laptop — enough to see both the authenticated flow and the walled-garden portal flow in action, small enough not to tax the host. You can bump this later once you know the box handles it. Click Start.
What happens next, in order:
- T+0s — CPESIM creates 10 veth pairs inside a dedicated network namespace, attaches them to
veth-access-vppon the VPP side, and sends DHCPDISCOVERframes from each simulated MAC. - T+2s — The BNG's control plane processes each DISCOVER, offers a
100.64.0.xlease, sees theREQUEST, sendsACK, and creates a subscriber session. Subscribers appear on the Subscribers page one by one. - T+5-10s — 8 authenticated subscribers (the 80% non-captive ones) start pulling a ~2 GB test file. Downstream throughput on the Dashboard climbs from zero to around 200 Mbps.
- T+15-20s — 2 captive-portal subscribers (the 20% captive ones) hit the walled-garden redirect and get held in a
CAPTIVE_PENDINGstate. They show up on the dashboard but push no data-plane traffic. - T+30s — steady state. All 10 subscribers online, all in the state they'll stay in until you stop the simulator.
Flip to Subscribers in the left nav and you can watch the fleet appear one row at a time as DHCP finishes for each simulated CPE:
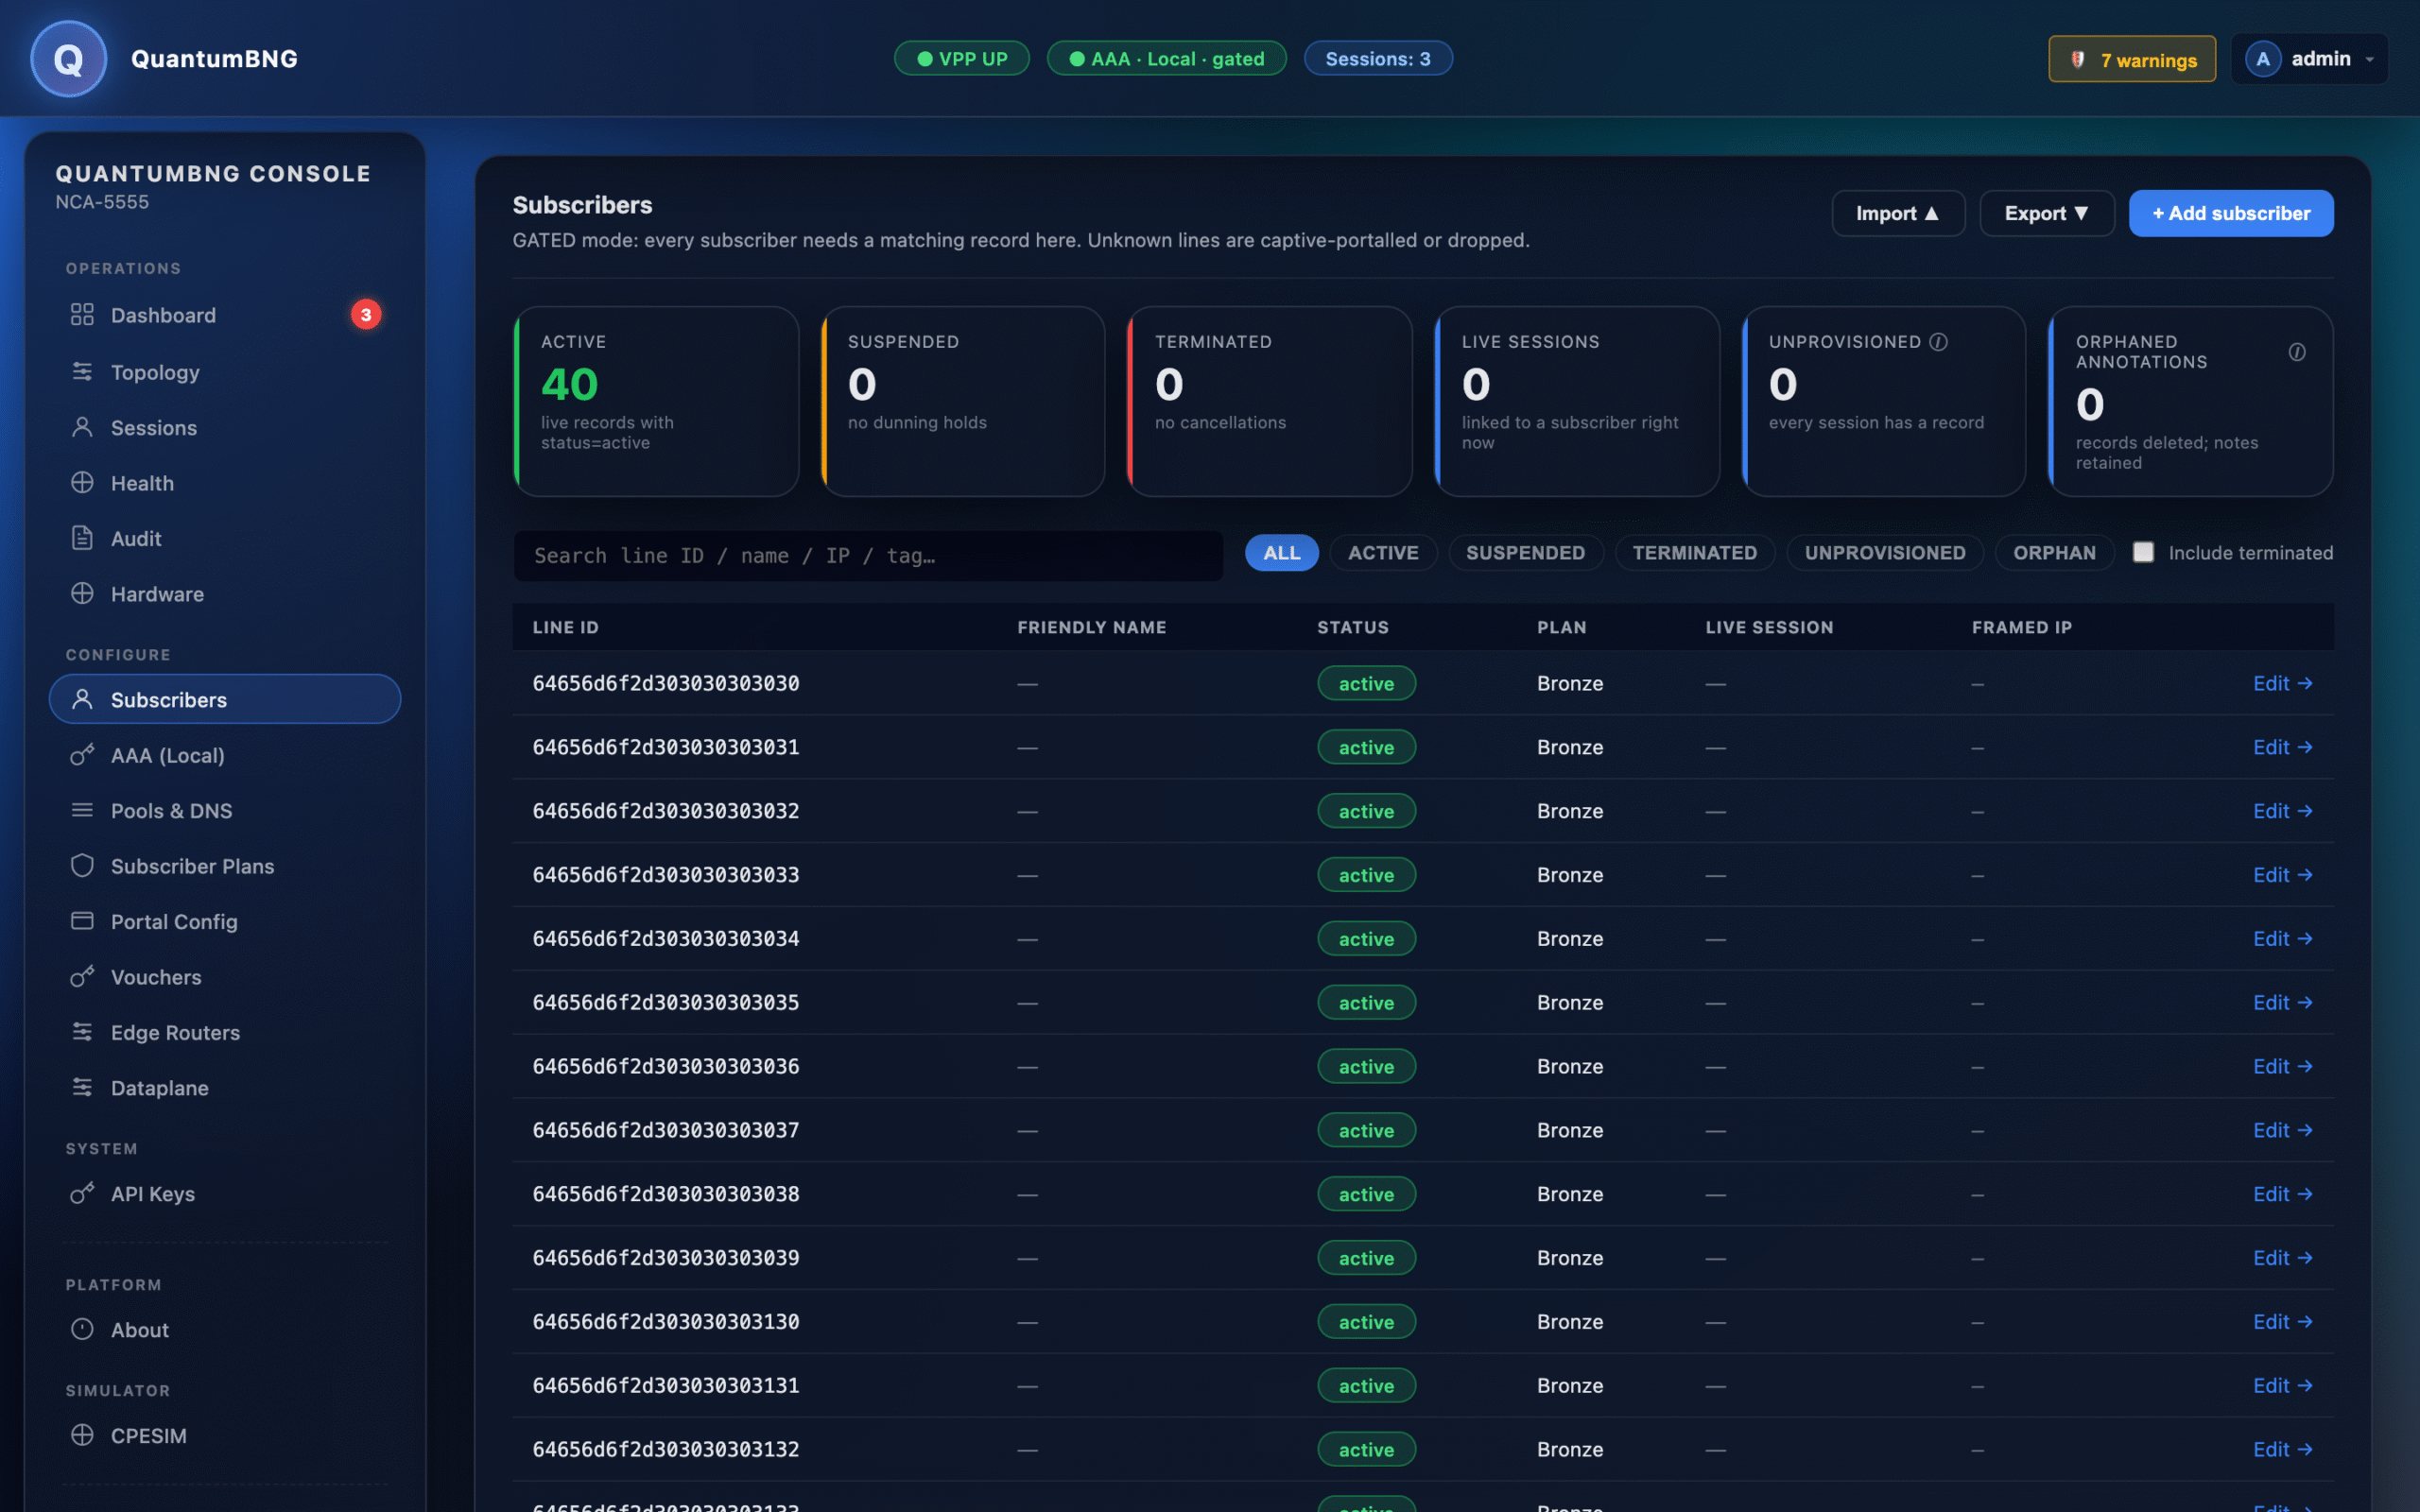
Flip to Dashboard and you should see: aggregate downstream hovering around 200 Mbps (the plan's PIR × 8 authenticated subscribers = 25 Mbps × 8), and per-plan meter charts showing green / yellow / red bands.
Step 8 — What the dashboard is telling you
Throughput panel (Overview). Aggregate bits/second in and out through the BNG's dataplane, sampled every 5 seconds. The number matches what CPESIM's simulator page reports because both read from the same VPP counter.
Session state pills (Overview + Subscribers). Every subscriber card has a color: green for AUTHENTICATED and passing traffic, yellow for CAPTIVE_PENDING, red for IDLE or EXPIRED. Real customer traffic looks like this too — most subscribers green, a small captive-portal minority yellow.
QoS meter (per plan). For the Bronze plan you'll see three bands: green (within-CIR traffic, guaranteed), yellow (CIR-to-PIR burst), red (over-PIR, dropped by the QoS meter). At the 20/25 Mbps CIR/PIR settings and 8 authenticated subscribers, aggregate downstream sits around 200 Mbps — well within what a real BNG's control plane can handle, and with plenty of headroom to scale up.
Events (Dashboard → Events). Every simulated CPE's onboarding lands here as an event stream: subscriber_bound, subscriber_authenticated, subscriber_traffic_first. Same timeline you'd see on a real customer, just at simulator-scale speed.
Prometheus metrics (Advanced). The /metrics endpoint is scraped every 15 seconds by the built-in Prometheus instance. If you want to graph any counter yourself, http://localhost:9090/ from your host browser hits the raw Prometheus UI.
Step 9 — Stop and clean up
Stop the simulator: back on the Simulator page, click Stop. The 10 simulated CPEs release their leases (real DHCP RELEASE frames), the BNG tears down sessions, and everything returns to zero.
Uninstall CPESIM (optional): About → Toybox → CPE Simulator → Remove. This unregisters the systemd unit, removes /opt/bng-demo/, and drops the Simulator entry from the left nav.
Shut down the appliance: either Machine → Close → Send the shutdown signal in the VirtualBox window (graceful; ~30 sec), or from your host terminal:
ssh -p 2222 vagrant@localhost 'sudo poweroff'Delete the appliance (if you're done evaluating): with the VM powered off, right-click it in VirtualBox → Remove → Delete all files. This deletes the imported VM plus its virtual disk (about 6 GB back to your host).
Where to go next
You want to run this on real hardware. VirtualBox can't do line-rate — no vfio-pci means no DPDK bind. Grab the from-scratch installer tarball from the same release page, unpack it, and run sudo ./install.sh on the target machine. Any x86 server with a supported Intel or Mellanox NIC and 8+ CPU cores can run production QuantumBNG. Full step-by-step is in the Quantum BNG Installation Guide bundled inside the tarball (controller/installation.md).
You want to change TLS from self-signed to Let's Encrypt. Contact Bluedot support for the Let's Encrypt setup guide — it's not currently in the shipped tarball but is available on request.
You hit a bug or want to file a feature request. Bluedot support: info@bluedot-insight.com with the version pill from the appliance's About page and the last 200 lines of journalctl -u bng-deploy from ssh -p 2222 vagrant@localhost.
Known limitations of the OVA path (why they're limitations)
No DPDK, no line-rate. VirtualBox does not expose vfio-pci, so VPP can't own a physical NIC. Everything moves through veth pairs. Expect single-digit Gbps aggregate throughput at best — this is a functional appliance, not a performance benchmark rig.
No 1 GB hugepages. The default fallback is 2 MB hugepages. VPP works fine, but memory-per-CPE overhead is slightly higher.
No real RADIUS. The appliance uses local-only AAA. If you want to test against a real RADIUS server, run the tarball install on a machine with a route to your RADIUS endpoint.
Single admin user. Multi-user role-based access is fully supported (Users page), but the OVA ships with just the one bootstrap admin. Add more if you need to demo delegation.
QuantumTouch BNG · installer v1.2.0-62 · Bluedot Insight LLC